Wednesday, June 29, 2016

Fresh and Fabulous! Fire Roasted Green Chili and Onion Salsa Verde Recipe!!


Let's put some of those fresh, fire roasted green chlies to work for our dinner shall we?  This recipe for fire roasted green chili and onion salsa verde is delicious and super simple!  This goes together in no time and if you already took the time to roast your chilies, then this is doubly easy!

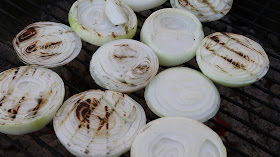
I used about six of the fire roasted chilies for this batch of salsa verde.  I put the chilies along with 1 sweet onion that I sliced and charred on the grill in the blender.  I added 2 or 3 cloves of garlic, a good handful or about 1/2 cup packed of fresh cilantro and a 2 tablespoons to 1/4 cup of lime juice and a teaspoon of salt.  You don't want to leave the salt out here or it will be very bland.

Blend that smooth.  Taste for seasoning.  You can add whatever you like here.  Cumin, lime powder and zest would be great or some oregano and even a pinch of chipotle or cayanne pepper would be nice depending on your heat tolerance.  


I took two additional peppers and one thick slice of charred onion and chopped them roughly.  I added them to the blended salsa and stirred well.  This will give some body and toothsomeness to the salsa and it will also give you a good hearty bite when you dip your chip in there.

You can use this to serve with chips, spoon over a burger or make some wicked chicken salsa verde or even green chili stew.  This is a great base as a cooking sauce for a slow cooker meal or even a quick green chili enchilada at the end of a long day.  I even like this spooned over scrambled eggs.  Divine!

You can also do this with canned, whole green chilies if you can find them, but that will not give you the delicious smoky flavor that you get from the fire roasting.  


So there is something amazing you can do with those roasted chilies we made.  I plan on spooning this over my green chili burger very soon.  I also plan on using this on some eggs for breakfast!  No matter what you use it for, you are not going to want to be without it once you give it a try!

So, as always, I hope you try this and I hope you love it!

Happy Eating!

Noreen's Kitchen
Fire Roasted Green Chili & Onion
Salsa Verde

Ingredients

6 anaheim chilies, fire roasted and peeled
1 large sweet onion, sliced and charred
1/4 cup lime juice
3 cloves garlic, minced
1/2 cup packed, fresh cilantro
1 teaspoon salt

Step by Step Instructions

Place 4 chilies and all but one slice of onion along with cilantro, garlic, lime juice and salt into the cup of a high powered blender or food processor. 

Process until pureed consistency.

Pour into a bowl and set aside.

Chop remaining green chili and slice of onion roughly.

Add chopped chilies and onion to the bowl of puree and stir well.

Taste for seasoning.

You can spice this up any way you like.  Add cumin, oregano, cayenne or even some chipotle powder for a kick.

Enjoy as a cooking sauce or served as a dip or spooned over a burger or in a taco or even over scrambled eggs.


Enjoy!

You can get a printable copy of this recipe here:  http://bit.ly/29rbV4p

You can see how I made this in my YouTube video:


Monday, June 27, 2016

How To Fire Roast Green Chilies At Home! A Serious Summer Treat!


Summer is on and we are heading right into the thick of it!  Independence day is almost here and we have all things picnic and BBQ on our mind.  So on that note we are embarking on a theme for July of perfect picnic and bbq foods.  Today we begin with some amazing and easy fire roasted green chilies!  

Green chili season is just about here for those of us who grew up in the southwest and remember the middle of summer being the time when Hatch green chilies would be abundant and being fresh roasted at the farmer's market, at the swap meet and just about anywhere else you can think of!  

I lived in Northern Arizona for a long, long time and July was always when the fire roasters would show up at the Flagstaff Farmer's Market.  Giant mesh drums set over open flames.  The drums were filled with Hatch green chilies fresh out of New Mexico fields.  The smell is intoxicating and the sheer volume has you pick up on that delicious fragrance from a mile away, quite literally.  

The deep green peppers would go into that drum by the barrel full and the roasting man would turn that drum until those peppers were soft, black and blistered,  That is the time when you would request the amount you would like.  He would put them in a paper sack and away you would go.  Ready to create something wonderful.

The drive home would be difficult because the smell of those chilies is amazing and you want to just dig right in!  You can't get home fast enough to slap one on a freshly grilled burger with melted pepper jack cheese on top!  


Enough reminiscing though!  You don't have to live in New Mexico or Arizona to enjoy fire roasted green chilies at home!  Keep in mind that Hatch green chilies will be available soon in the stores and I can even get them in my area so if you find them buy a case and make your own salsa because it will be amazing!  But you can do this with Anaheim chilies with no problem.  

Get your grill good and hot.  No matter if it is charcoal or gas.  Just get it nice and hot.  Then pop those peppers right on that grill.  When you hear them start popping and crackling you will know that the magic is beginning to happen!  You want to keep turning and turning and turning until the skin is black and blistered all around the pepper and they become soft and no longer have a stiffness to them.

When you have removed the peppers from the grill you want to put them into a large bowl.  Then back into the kitchen!  Fill the bowl up with cold water and begin to gently rub the charred skin off the peppers.  It should come off quite easily.  The gently pull the stem off and run your finger down the side to split the pepper open.  Dunk it back in the water and wash the seeds away the best you can.  Then into an awaiting plate or bowl.  

You can use these peppers to make pork green chili, chicken salsa verde, green chili sauce, chunky roasted green chili and onion salsa, or green chili burgers.  You will want to use these in about a week and if you can't just pop them in the freezer until you are ready to use them.


It is not recommended to can these on their own, however you could use them in a recipe calling for green chilies if you are canning up some salsa or other dish.  You will want to research that on your own.  

I hope you see how easy it is to fire roast your own green chilies at home.  I hope you give this a try and I hope you love it because there really is nothing better than a fresh fire roasted chili on your burger!  

Happy Eating!!

You can see how I did this in my YouTube Video:


Saturday, June 25, 2016

Perfect Hard Cooked Eggs in the Pressure Cooker! You Will Never Boil Them Again!


When I first purchased my pressure cooker, I had visions of quick and easy pot roast and chicken soup, however as the years have gone by and I have fallen more and more deeply in love with my pressure cooker, I have discovered a host of wonderful things that I can do with this fantastic electronic appliance.  

I have shared many different and delicious recipes using this pressure cooker and another that I had several years ago that was a different brand.  I actually went through two of those.  The old versions were only 5 quarts.  A couple of years ago this model was featured as a value of the day on HSN and angels sang LOUDLY!  This has been an amazing pressure cooker and I highly recommend that every one get one of these fantastic appliances because it will make your life easier!

Today I wanted to share with you how to make perfect hard boiled eggs in your pressure cooker!  I had no idea that this could even be done and when I learned about it, I was still skeptical.  My model did not come with instructions for how to do this so I went looking.  Then I saw my friend Heather make some and I had to try.  Additionally, a viewer gave me some sound tips on how she did hers so I employed her technique and the rest is history!


To pressure cook eggs to perfection you need to have a rack in the bottom of your pressure cooker.  I have a rack that is for cakes, but any rack will work as long as it will fit in the bottom of your cooker.  You can even use a small plate if you like.  It will need to hold the eggs above the water so keep that in mind.  I do recommend getting a rack if at all possible.  Pour in 1 1/2 cups of water then lay your eggs in there in a single layer.  Some people say you can do multiple layers, but I don't recommend that.  

Put the lid on and follow the manufactures instructions for sealing up your cooker then set for 5 minute on the "rice" setting.  Allow to come to pressure, cook and then time out.  Quick release your pressure being careful to avoid the stream of steam and remove the lid away from you.

Using tongs, remove the eggs to an ice bath to cool.  You can choose to peel them all at one time or place them in the fridge in their shells.  The one thing I will say about pressure cooking eggs, aside from the ultimate perfection of a purely pale yellow and creamy yolk, these eggs will nearly leap out of their shells for you with little effort and sticking.  This is especially nice if you buy farm fresh eggs, which can normally be a bit of a bugger to peel.

I am not exaggerating when I say I will never cook my hard boiled eggs another way again.  This method is a sheer winner overall and an energy saver and a water save and a time saver and a sanity saver!  You will always have perfect eggs now when you want to make deviled eggs or just have eggs on hand for breakfast or snacking!  


I hope you will get that pressure cooker down off the shelf and give this method of hard cooking eggs a try!  I think you will be pleasantly surprised to be sure!

I hope you try it and I hope you love it!

Happy eating!


You can see how I did this in my YouTube video!


I have an Elite 10 Quart Electronic Pressure Cooker.  You can get one for your own by following this link: http://amzn.to/28WXOWW


Monday, June 20, 2016

10 Minute Lemon Paprika Shrimp and Pasta!! A "Tasty" Recipe Trial! Did It Work? You Be the Judge!


Tasty videos are so popular in everyone's Facebook feed, that we wanted to give some of these recipes a try to see if they really are what they appear to be.  In a previous installment, we shared a slow cooker apple crumble that was good, but not great.  Today we are sharing a dinner recipe that my daughter Molly shared with me for this Lemon Paprika Shrimp and Pasta.  You can find the original Tasty video and recipe here:  http://bit.ly/lemonpaprikashrimp


This dish was super simple to make and it was good.  However it was a bit on the spicy side and if you like that, great!  But if you like it a bit milder, add less of the smoked paprika and add in regular paprika that will not be so spicy.  I also thought the sauce was a bit on the thin side so at the end, in an attempt to not over cook my shrimp into eraserville, I added a bit of a cornstarch slurry to tighten up the sauce a bit.  The sauce was still a bit on the thin side, but I was not going for a gravy consistency and just let it remain the way it was and it was easily soaked up into the pasta.

One of the other things I did differently was to not add the pasta to the pan because I did not want to have everything mashed together in case there was leftover pasta.  So we served them separately.  We enjoyed this and the next time I would make a few changes that would boost the flavor.  Other than spicy, this was a little bland for my taste and feel like it may need a bit more flavor.  That is the beauty of giving new things a try.  They actually give birth to even more new things!


In the end, we had a great dinner and it spawned a few new ideas for future recipe ideas.  We love shrimp, so anything with it, is going to be a great dinner anyway.  

I hope you will check out this recipe and give it a try for yourself and see what you think!

Happy Eating!


Follow me on social media!

Facebook:    http://on.fb.me/12bdibt

Twitter:         @noreenskitchen

Instagram:    http://bit.ly/12bdqrp

Google +         http://bit.ly/1o5GMYy


You can see how I made this in my YouTube Video!


Wednesday, June 15, 2016

Meatless Never Tasted So good! Vegetable Stacks ~ Vegetarian Sheet Pan Dinner!!


Here is a great dinner option for meatless Monday or any day!  Vegetable stacks, vegetarian sheet pan dinner is easy to make and nobody in your family is going to miss the meat!  We really enjoyed this meal and served along with some ancient grains blend that I cooked up in the pressure cooker, this meal was simply delicious!  

We have been wanting to share this for a while and we have had it a couple of times so far this summer and we all really enjoy the simplicity of this meal.  Super simple to make and even the leftovers can be folded into leftover rice, quinoa or couscous for an awesome riff on a tabbouleh salad the next day!


I used some giant portobello mushroom caps from the warehouse store and some thick sliced eggplant, yellow and zuccini squash along with some thick sliced Vidalia onions.  I marinated each veggie in a zip top bag with some of our favorite zesty Italian dressing for 15 to 20 minutes then laid them on a sheet pan lined with a silicone baking mat.  

We baked off the veggies for 20 to 25 minutes until they reached our desired doneness and then created our vegetable stacks on top of the prepared quinoa blend that had been prepared pilaf style.


You can always change up the dressing/marinade and make this with a delicious teriyaki or Asian sesame dressing, or Greek, French or even just some oil and balsamic vinegar would be great!  You decide which direction to take.  No matter what you choose I know it will be delicious!

I hope you give this vegetarian sheet pan dinner a try and I hope you love these vegetable stacks!

Happy Eating!

You can get a printable version of the recipe here:  http://bit.ly/1UwjWb2


You can see how I did this in my YouTube video:


Noreen's Kitchen

Vegetable Stacks
Vegetarian Sheet Pan Dinner


Ingredients
4 portobello mushroom caps
2 medium sized eggplant
2 large sweet onions
2 zucchini
2 yellow squash
2 cups marinade or dressing of choice
salt and pepper to taste

Step by Step Instructions

Preheat oven to 375 degrees.
Clean the gills from the portobello mushrooms and set aside.
Slice eggplant, and squash into 1/2 inch slices.
Slice onion in 1/2 thick slices and place on skewers to make turning easier.  I put two slices per skewer.
Place 1/2 cup of dressing or marinade into a zip top bag and add the mushroom caps.  Seal the bag and distribute the dressing to coat the mushrooms.  Set aside for 15 t0 20 minutes.
Do the same with the rest of the vegetables and allow them to marinate for at least 15 minutes.
Lay the vegetables in a single layer on two sheet pans that you have lined with either foil or silicone mats.
Bake for 20 to 25 minutes or until the vegetables reach your preferred doneness. 
Remove from oven and allow to sit for five minutes before preparing the stacks.
Build stacks by arranging a bed of quinoa, rice or couscous on the bottom of the plate and stacking a mushroom cap on the bottom then squash, onion and topping of with a slice of eggplant.
You can sprinkle with parsley or drizzle with more dressing or marinade if desired before serving.

This is a dish best eaten fresh, however leftover roasted vegetable can be chopped and mixed with any of your leftover rice, quinoa or couscous to make a version of tabbouleh salad that you can eat as a lunch the next day.


Monday, June 13, 2016

A Twist On A Classic! Mango Pineapple Salsa!


Here is a delicious and fresh twist on salsa that you may not have considered!  Salsa directly translates to simply "sauce" in Spanish do just about anything qualifies.  However we have come to know and love salsa as a dip that is typically full of tomatoes, jalapenos and other peppers along with onions, lime juice and spices.  Today I want to share with you a different kind of salsa that I know you are going to love and that is perfect to take to summer gatherings.  Just as perfect on a chip as it is draped over a beautifully grilled piece of chicken, fish or pork, you are going to want to give this delicious mango and pineapple salsa a try!

I have always been a fan of fruit with grilled meats or even used in a glaze for chicken, pork or fish.  This is like a fresh chutney that will compliment a grilled chicken breast fabulously.  The sweet mango along with the sweet and tangy pineapple complimented by lime juice and the mild heat from both the red onion and jalapeno, this is a real winner.  


One of the secrets to making a fruit salsa like this that is both savory and sweet is the way you cut the ingredients.  I, personally feel that it is important to cut the fruit in a fairly small and even dice and the jalapeno and onion at a mince, which would be even smaller.  You don't want to bite into a big chunk of jalapeno so this will even out the flavors and make everything meld together really well.

This salsa is best when made fresh, but you can make this a day ahead and then store in the fridge until ready to serve.  That way if you are getting ready for a party you won't be chopping things at the last minute!


If you like yours a bit on the spicier side, you can always add a bit of minced habenero pepper if you dare, but be sure to warn guests that you have done that because they may get a very unpleasant surprise!  While a little would be  nice warm heat, a whole pepper may be too much so start off with just a little.  

This mango and pineapple salsa if perfect to take along to holiday picnics and barbecues or even as a nice alternative to a summer potluck or church gathering.  I always love to take something different and seasonal and fresh!  This certainly fits the bill!

I hope you give this fresh and fruity mango and pineapple salsa a try and I hope you love it!

Happy eating!

Noreen's Kitchen
Mango Pineapple Salsa


Ingredients

1 cup diced fresh mango
1 cup diced fresh pineapple
2 tablespoons fresh jalapeno, minced
1 tablespoon cilantro, chopped
1/2 cup red onion, minced
2 tablespoons fresh lime juice
1 tablespoon honey
1/2 teaspoon salt


Step by Step Instructions

Combine all ingredients together in a large bowl and stir to combine. 
Serve with chips or over grilled meats.
Store unused portion in an airtight container in the refrigerator for up to three days.

This is best made and eaten fresh so only make what you think you will use in a few days.

You can see how I made this in my YouTube video here:


Hamilton's Profiteroles ~ A Fancy Dessert Made Easy! Inspired by The Award Winning Hamilton: An American Musical!!


Today I want to share with you a simple and amazingly beautiful dessert that will rock your socks off and impress the next time you entertain!  I am inspired to make  what I am calling "Hamilton's Profiteroles" in part by the amazingly wonderful and incredible Broadway musical "Hamilton: An American Musical".  

Anyone who knows me knows that I am a huge theater geek!  I listen to more Broadway soundtracks than just about anything else and when my youngest daughter held me captive on a long car ride and insisted that I listen to the Hamilton soundtrack I was immediately hooked!  I always try to garner inspiration for recipes from the things in life that I love and so I went looking to see if I could find out what Alexander Hamilton's favorite food may have been.

Since food historians cannot specifically pinpoint a certain dish, they do note that at a dinner where Hamilton and James Madison were entertained at the home of Thomas Jefferson, they were served a dish for dessert that impressed the first secretary of the treasury.  He recalled that it appeared as if ice cream had been baked into a pastry shell and I immediately knew it had to be the French dessert profiteroles.  

Since Jefferson was the French ambassador before serving as President I figured this was a good assumption.  That his dinner parties would have been filled with French cuisine and dishes inspired by his trips abroad.  So here is my adaptation of Hamilton's Profiteroles.  


A simple cream puff shell filled with ice cream and set in a pool of rasbperry coulis then drizzled with rich, dark chocolate sauce.  This dessert borders on magical and how could anyone resist?


If you have not yet heard the soundtrack for Hamilton, I highly encourage you to seek it out and have a listen.  It is wonderful and full of history.  It puts a founding father's story into a beautiful arrangement and gives respect to someone who I sometimes think gets lost in the shuffle and may deserve a bit more recognition than we give him.  If you are a history buff or a music lover, than this is definitely for you.

This is a passion for me as well as my 16 year old daughter Micah I hope you give this a try and I hope that you love it!  Dive in and get a taste of history!

Happy Eating!

Find my Raspberry sauce video here:  http://bit.ly/21dyUmP

See how to make the cream puff shells here: http://bit.ly/creampuffdough

See how I made this in my YouTube video:


Thursday, June 9, 2016

Noreen's Kitchen Basics: Classic Cream Puff Dough AKA Choux Paste!


Today a kitchen basic!  Cream puff dough or what is commonly called choux paste in the culinary world is a wonderful and basic recipe to have in your box, binder or under your belt!  Knowing how to make these delicious puffs of goodness is a wonderful thing to know!  You will mesmerize and amaze your friends with your cooking prowess and might I say you may even impress yourself.

This dough or paste is easy to fix with ingredients that you have on hand and in the end will render you a multitude of options as to how to prepare it.  This dough is often used to make cream puff shells, but it is also the same dough that is used to make eclairs, beignets, churros, gugeres, and cruller donuts.  

This is a rich thick paste, more than a "dough" and it uses lots of eggs as a leavener that will make these puff and expand to an airy, crispy goodness.  They are similar in nature to a popover or Yorkshire pudding only there is no fat involved in the cooking process and you don't dispense the dough into a vessel for baking.  These make a great dinner roll with a twist and you will find it hard to stop eating them because of their light deliciousness.


I recently said to a friend of mine who was excited to hear I was making this that these are so easy to make it is almost embarrassing.  That is the truth!  You bring milk, butter, salt and a tiny bit of sugar to a simmer and then add flour and stir together to make a thick paste that is done when it begins to form a film on the bottom of the saucepan.  Then transfer to a bowl or in my case the bowl of your stand mixer and add one egg at a time until all are incorporated.  What you have will be a very sticky, gloppy looking batter-ish looking dough.  You can now transfer this to a piping bag and pipe little mounds of the batter onto some parchment or you can make eclair shells by piping long ropes.  If you don't do the pastry bag thing, then you can use a couple of spoons or a scoop to distribute the dough onto the baking sheets.

These bake in a 375 degree oven for about 25 to 30 minutes.  The number you get will depend on how large you have made your shells.  I did medium sized shells and got a little over 3 dozen nice cream puffs.    When they are done, just let them sit till cool.  You can pop one open to check to see if they are nice and dry on the inside.  If not, pop them back in for a few more minutes.  If you don't get them baked all the way they will collapse on themselves when they cool.


Now you are ready to make cream puffs.  Fill these will pastry cream, custard, stabilized whipped cream, mousse, even chicken or tuna salad for a beautiful lunch presentation!  You can just serve these by themselves with jam for a lovely breakfast accompaniment as well!

I am making a special dessert using these cream puff shells that I will be sharing with you in another installment, so stay tuned and I can't wait to share it with you!   There's a million things I haven't done, but just you wait!  Just you wait!

If you want to make these in advance, you can pipe them or scoop them onto a baking sheet, then freeze them till solid and pop them into a zip top bag until ready to bake, then place on a baking sheet and allow them to thaw then bake as per the instructions.  These will not freeze well after they are baked because the dough will collapse when exposed to a lot of moisture.

I hope you give this classic cream puff dough or choux paste a try the next time you want to wow someone and I hope you love it!

Happy Eating!


Noreen's Kitchen
Cream Puff Dough
Classic Choux Pastry


Ingredients
1 cup cold water
1 stick (4 ounces) butter
1/2 teaspoon salt
1 teaspoon granulated sugar
1 cup all purpose flour
4 whole eggs


Step by Step Instructions


Preheat oven to 375 degrees.
Place water, butter, sugar and salt in a saucepan and bring to a boil over medium high heat.
Add flour and stir until it comes together in a shaggy ball.  Keep over the heat until a light film forms on the bottom of the saucepan.  When you stir and turn the dough over it will be smooth and want to stay together.
Transfer to a deep bowl or the bowl of your stand mixer allow to cool for five minutes before proceeding.
Using your mixer on low, add one egg at a time waiting until it is incorporated before adding the next one.  When you can see the mixture pulling away from the side of the bowl slightly after adding the last egg, your mixture is ready.
NOTE:  You can mix this by hand but it is very difficult toward the end as this batter gets very thick and hard to mix. 
You can now scoop the mixture using a couple of spoons or a cookie scoop or you can place the dough in a piping bag and pipe the shells you desire. 
Bake for 25 to30 minutes or until puffed, golden brown and when one is opened up you see the insides are dry and not soggy. There will be some moistness on the inside, just not wetness. 
The amount this recipe yields, depends on how big or small you choose to make your shells.  I get approximately 18 medium sized cream puff shells from one recipe.
If you wish to make these in advance, you can pipe or scoop onto a baking sheet and then freeze till solid then transfer to a zip top bag or airtight container and store in the freezer for up to 3 months until ready to bake.  To bake, lay out the desired amount on a baking sheet lined with parchment and allow to thaw.  Bake as above

See how I did this in my YouTube video:

Monday, June 6, 2016

Easy Peasy & Fancy Schmancy! Pork Scallopini!


Today I want to share my quick and easy pork scallopini recipe with you!  Yes, you read that right!  Pork!  I accidentally took out a package of hand cut, boneless pork loin chops out of my freezer thinking they were chicken breasts because I forgot to label them.  So I needed to do something with these beauties.  Since I live in pork country, this is a super economical meal to make for my family and they love it.  You can, of course do this dish with thin chicken cutlets or even with the traditional veal cutlet if you prefer. 

This dish could not be any easier to make.  The end result is a silky, rich dish that is a mushroom lovers delight.  The light sauce is super flavorful and the perfect accompaniment to hot buttered pasta, rice or couscous.    


I started by slicing my pork chops in half.  I had hand cut some fairly thick chops off of a large whole pork loin I purchased.  So I got between two and three pork cutlets off of each chop and I had a total of four.  Then I pounded the cutlets with a meat mallet or something closely resembling a meat mallet.  In my case that would be a mini cast iron skillet.  That gets the job done.  You should use what you have available to you.  Then I dredged the meat pieces in a seasoned flour to coat.


The meat was sauteed in a mixture of butter and olive oil, in batches until they were all cooked and a bit browned.  Then I removed the meat to a warm plate to build my sauce.   I added onion garlic and a passel of mushrooms to the pan.  I also added a splash of chicken stock to de-glaze.  Then I let all the veggies steam saute for a bit to soften.  

Next I added chicken stock and lemon juice to the pan and gave everything a good stir.  Again I let this simmer for a few minutes to reduce and build flavor.  Then I added some additional butter to finish the sauce and give me a beautiful rich and glossy finish.  

I added the meat back to the pan and nestled those cutlets down in all that lovely sauce and mushroom loveliness.  I turned the heat down just a bit and let that simmer for a few additional minutes before turning the heat off and letting everything come to a peaceful rest before serving.


I served this on a bed of cooked and buttered angel hair pasta, but this would be just as delicious served with rice, plain or pilaf, couscous, quinoa or even cauliflower rice if you are on a low carb diet.  In which case, you can always leave out the flour and just sautee the meat in the butter and olive oil.  

This dish is quick and simple.  It has tons of flavor and a satisfying air about it.  I love this dish for a busy weeknight or a lazy weekend evening when I don't really want to do a bunch of work.  This is excellent served as I have shown or it can be dressed up for company and nobody has to know how easy it was for you to make!  I promise you though, they will be asking for the recipe!  So your secret won't be a secret for long.  

I hope you give this recipe for pork scallopini a try and I hope you love it!

Happy Eating!

Get a printable version of the recipe here:  http://bit.ly/1tdjvbx


Noreen's Kitchen
Pork Scallopini

Ingredients

2 pounds thin boneless pork loin chops
4 tablespoons butter, divided
2 tablespoons olive oil
1/2 cup all purpose flour
1 teaspoon salt
1 teaspoon Italian seasoning
1 pound Crimini mushrooms, sliced
1 large onion, minced
4 cloves garlic, minced
2 tablespoons fresh parsley, minced
Juice of 1 lemon
1 cup chicken stock or dry white wine

Step by Step Instructions


Heat 2 tablespoons of butter and all of the olive oil in a large heavy bottomed skillet, over medium high heat.

If necessary, pound the pork chops with a meat mallet until they are about 1/8 inch thickness.

Mix together flour, salt and Italian seasoning in a shallow dish.

Dredge the pork chops in the flour mixture to cover completely.  Set aside on a dish until all of your chops are finished.

Working in batches, brown the pork chops for 3 to 4 minutes on each side until they are browned and slightly crispy looking.  Remove to a covered plate to keep warm while to finish the rest.  Remember not to crowd the pan or you will not get a nice brown coating.

When the pork chops are cooked, add the onions, garlic and mushrooms.  Using a flat spatula, gently coax the browned bits from the bottom of the pan.  If needed, add a splash of chicken stock to help you along.

Allow the vegetables to cook for 5 minutes until the onions are translucent and the mushrooms are softened.

Add the remaining chicken stock and the lemon juice to the pan with the veggies.  Stir well and allow the mixture to simmer for five additional minutes to reduce the sauce just a bit.

Add the butter to the sauce to finish.  Stir until it is incorporated.

Add the pork chops back to the pan and nestle them into the vegetables and sauce.  Allow to simmer for five more minutes.  This will help to thicken up and bind the sauce even further for a beautiful silky finish.

Turn off the heat and allow to sit for five minutes before serving over rice or pasta.


See how I made this in my YouTube video: