}]; Noreen's Kitchen: 10/01/2016 - 11/01/2016

Monday, October 24, 2016

Thanksgiving Showstopper! Creamed Corn Bread Pudding ~ Holiday Recipe


Today I am sharing a different and delicious recipe for a creamed corn, bread pudding!  This is eggy and bready and delicious with homemade creamed corn eggs and sour cream making this a delicious treat that would also be a great alternative to a stuffing.  

I started out with a loaf of my homemade perfect sandwich loaf that I cut into 1 inch cubes.  You can cut the crust off if you like, but I did not.  It adds color, texture and flavor.  The custard is mixed together and poured over the bread and then I like to make sure that everything gets a good turn to coat.


If you like, you can dot the top with butter.  Because butter makes everything better.  You can also cover this with foil for the first 20 minutes to ensure a beautiful moist and puffy outcome.  You can remove the foil for the last ten minutes to crisp the top.  You don't have to do those things but they are lovely if you want to.

Baked this for right around 35 minutes and it was delicious!  You wouldn't think that this sounds like a great idea, but trust me!  It is delicious!


The combination of the homemade creamed corn folded into this delicious custard is the perfect side dish to roasted or grilled meats.  I served this along side a roasted chicken and steamed green beans and it was really delicious.  

You can choose a softer bread if you like.  A brioche would be great or an egg bread of some sort.  Soft potato bread would be great or even some hamburger buns cut up into cubes will do the trick if that is what you have.


I hope you give this creamed corn bread pudding a try and I hope you love it!  

Happy eating!

You can find a printable version of this recipe on my website here:

You can see how I did this in my YouTube video here:


Business Inquiries can be sent to:
info@noreenskitchen.com

Noreen's Kitchen
Creamed Corn Bread Pudding


Ingredients

6 cups fresh bread, cubed
2 cups creamed corn, preferably homemade
1 cup sour cream
4 eggs
1 teaspoon salt
1 teaspoon cracked black pepper
1 teaspoon onion powder
4 tablespoons butter

Step by Step Instructions

Preheat oven to 350 degrees.

Butter a 9 x 13 casserole dish well.

Add bread cubes to the casserole, spread evenly and set aside.

Combine eggs, sour cream and creamed corn in a large bowl. Whisk well to combine.

Add seasonings and blend well to incorporate.

Pour the egg mixture over the bread cubes and if desired use a spatula to coat the bread with the custard.  Be sure this is spread evenly in the baking dish.

Dot the top with butter.

Cover with aluminum foil

Bake for 30 minutes and then remove the foil and continue to bake for another 15 minutes.

Remove from oven.  At this point your bread pudding should be puffy and golden.

Allow to rest for 10 minutes before serving.


Enjoy!


A Taste of the South! Southern Style Creamed Corn ~ Homemade Creamed Corn Recipe!!


Today we are starting our series of Thanksgiving dishes for this year.  Never too early to start thinking about the holiday and now is the time to start!  If you are just getting your thoughts together for your holiday meal, let me introduce you to something that I think would make a lovely side dish option for your holiday table.  Southern style creamed corn.

Creamed corn is an institution in the south to be sure! Did you know that there is actually no cream in creamed corn?  The creamy texture comes from the corn milk that is extracted from the cob.  This lends all the flavor and creaminess to the corn and it is something I think you are going to love.

The combination of sweet and savory marry perfectly in this dish.  It is so delicious you will want to lick the plate.  Yes, it is that good!  I started with 8 ears of bread and butter corn.  This is the last of the sweet corn for the season.  So if you are planning to make this for Thanksgiving, I suggest that you find a great place that still has some of this season's corn and grab it.  You can make this ahead of time and freeze it up to three months in advance of your event, so that is one thing you can do before the big day and just thaw, heat and serve.


When you remove the corn from the cob you want to be sure to only shave the outer parts of the kernels off the cobb.  Then go in with the back of your knife and scrape out all the juice and "milk" from the rest of the cobb.  This will look creamy and liquidy.  This is the magic of creamed corn.

I added a couple tablespoons of flour and sugar to the corn and stirred very well.  Then you want to add this mixture to a hot pan with 1/4 cup of melted and sizzling butter.  Mix this up and bring to a simmer.  Allow to cook for 6 to 10 minutes or until the corn is done.  When it turns a brilliant yellow color it usually means it is finished.  At this point you can add salt and pepper to taste and serve.

This creamed corn is a delicious dish to enjoy all by itself or next to just about anything you like.  I am going to be using this creamed corn in a recipe for another Thanksgiving side dish that will be shared in an upcoming video!


I hope this helps to clear up the mystery of creamed corn.  Now you can stop buying that grossness in a can and enjoy delicious creamed corn at the height of the corn season and make enough to stow in the freezer for later.  

I hope you give this Southern style creamed corn a try and I hope you love it!

Happy Eating!

A printable version of this recipe will be available on my website here: http://bit.ly/2enYmGk

You can see how I made this in my YouTube video:


Business Inquiries can be sent to:
info@noreenskitchen.com

Noreen's Kitchen
Southern Style
Creamed Corn

Ingredients

8 ears, fresh corn
2 tablespoons all purpose flour
2 tablespoons granulated sugar

4 tablespoons butter
1 teaspoon salt
1 teaspoon cracked black pepper

Step by Step Instructions

Remove corn from cob, by shaving the outer layer of the kernels into a bowl, then using the back of your knife, scrape the cob into the bowl, releasing the corn “milk” from the cob.  This will give you a creamy mixture that gives this dish it distinct texture and taste.

Add the flour and sugar into the corn mixture and stir well to combine.

Melt butter over medium heat in a heavy bottomed skillet.

Add the corn to the hot pan and stir well.

Bring the corn mixture to a simmer and turn down the heat to medium low.  Cook at a simmer for 10 minutes.  Be sure to stir often to avoid both sticking and scorching.  You may find it necessary to add up to ¼ cup of either water or milk to the corn during the cooking process so the pan does not become dry.

Turn off the heat and allow the creamed corn to cool for 10 minutes before serving.

This recipe is not suitable for canning of any kind.  You can freeze this for up to three months.

Store any leftovers in an airtight container and eat within 1 week.


Enjoy!

Absolutely Apple Pie Spice and Baking Blend ~ Apple Pie Spice Recipe!!


I recently shared an apple pie rugelach recipe in which I used my homemade apple pie spice blend.  Today I want to share this blend with you so that you can make it for yourself and use it in your baking for the upcoming holiday season!

This blend is simple and contains many spices that you most likely already have on your spice rack or pantry shelf.  This one contains the basics, cinnamon, nutmeg, allspice,clove and my secret ingredient, cardamom!  The cardamom adds a citrusy note that is not available anywhere else.  It really is delicious and reminiscent of many Scandinavian recipes for the holidays including Christmas Stolen.  


This recipe makes about 1/2 cup and will be very useful this season.  To  use, simply add up the amount of spices your recipe calls for and use an appropriate amount.  For instance, if your recipe calls for a teaspoon of cinnamon and 1/2 a teaspoon of nutmeg, a 1/4 teaspoon of clove and 1/4 teaspoon of allspice you can simply use two teaspoons of this blend.  The added cardamom will only add a delicious extra flavor profile to your finished recipe.


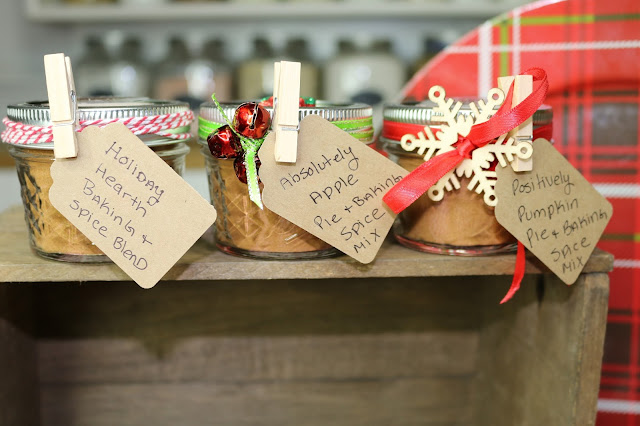
I have stored mine in a 1/4 pint mason jar and I think these would make lovely take away gifts for your holiday table.  Especially for your Thanksgiving dinner!  Then your guests could use these for their holiday baking and remember you while they do it.  These would make lovely place card holders for your guests to take home as well!  Decorate to fit your tablescape and you are all set!

I hope you give this homemade apple pie spice and baking blend a try and I hope you love it!

Happy eating!

You can find a printable recipe for this on my website here:

You can see how I made this spice blend in my YouTube video here:


You can find Molly Green Magazine on their website: http://bit.ly/2cTAqMh

Business Inquiries can be sent to:
info@noreenskitchen.com


Noreen's Kitchen
Apple Pie Spice and
Baking Blend


Ingredients
4 tablespoons ground cinnamon
1 tablespoon ground allspice
2 teaspoons ground nutmeg
1 teaspoons ground cardamon
1 teaspoon ground clove


Step by Step Instructions

Combine all ingredients in an airtight container and give it a good shake.

Store in a cool, dry and dark place and use within 6 months for best flavor.

Use by the teaspoon in recipes calling for apple pie spice or cinnamon for a delicious alternative to the single spice. 


Enjoy!


Pumpkin Crunch Pie ~ A new Twist On An Old Favorite ~ Piesgiving 2016

Pumpkin Crunch Pie, Noreen's Kitchen


Continuing on with our Piesgiving celebration, today I have a really nice way to push that pumpkin pie to the next level!  Today I am sharing my recipe for pumpkin crunch pie!  

If you have never had a pumpkin crunch pie, you are in for a real treat!  Traditional pumpkin pie is great, but this pie had the extra added bonus of a crunchy streusel topping that give this pumpkin pie just enough oomph to take it over the top.  I love streusel and paired with the pumpkin custard filling, this pie aims to please.  

I have made my old stand by, traditional pumpkin custard pie in a deep dish shell and then prepared a streusel topping to add to it.  You can add pumpkin pie spice or plain cinnamon to the streusel, but I did not this time, but you can if you want.  Make this one your own! 

Pioneer Woman Pie Plate:  http://amzn.to/2dtEgHv

Pumpkin Crunch Pie, Noreen's Kitchen


The secret is in the baking!  You initially might think that you are going to sprinkle that topping on top of the loose custard after you pour it into that prepared shell.  NO!  That is where you have to make some adjustments.  First you need to put this pie, sans, topping into a screaming hot oven at 425 degrees.  Then bake for 15 minutes.  That is when you will remove it from the oven and sprinkle that delicious streusel over the partially set custard.  Return that to the oven, reduce the heat and bake for an additional 45 to 50 minutes until your pie is almost completely set, the streusel has turned a beautiful golden brown and a knife, inserted in the center comes out clean with no indication that there is still a lot of moisture in that custard.

Pumpkin Crunch Pie, Noreen's Kitchen


Now comes the hard part!  Waiting!  Allow this pie to cool completely.  In fact, I would suggest that you bake this pie a day before you plan on serving it.  Pumpkin pie is always better when baked a day ahead and this gives the custard the opportunity to set to perfection as well as allow all those warm spices to really permeate the filling and give you that delicious pumpkin pie flavor that you love so much!

Rada Pie Server:  http://amzn.to/2eycEBU

Pumpkin Crunch Pie, Noreen's Kitchen


I always think that serving pumpkin pie with ice cream is not great.  However, I would serve ice cream with this.  The crispy streusel will soak up the ice cream and give you a delicious treat.  Of course whipped cream is almost always a given when it comes to pie, so since this is most likely for a holiday, I say go for it!  

Pumpkin Crunch Pie, Noreen's Kitchen


I hope you will give this pumpkin crunch pie a try and I hope you love it!  Stay tuned for more Piesgiving recipes coming very soon!

Happy eating!

You can see how I made this delicious pie in my YouTube video here:


You can get a printable version of this recipe on my website here: 


Business Inquiries can be sent to:
info@noreenskitchen.com


Noreen's Kitchen
Pumpkin Crunch Pie


Ingredients

One prepared deep dish pie crust unbaked
1 1/2 cups pumpkin or 1, 15 ounce can *
2 eggs
2 tablespoons all purpose flour
1/4 teaspoon salt
1 1/2 teaspoons pumpkin pie spice*
1 cup granulated sugar
1 can evaporated milk, 12 ounces
Topping
1 cup all purpose flour
¼ cup brown sugar
¼ cup granulated sugar
1 teaspoon pumpkin pie spice
¼ teaspoon salt
1 stick cold butter.

Step by Step Instructions

Preheat oven to 425 degrees.

Mix pumpkin, flour, salt and spices together being sure to combine thoroughly.

Add sugar and eggs and whisk well to incorporate.

Add milk and blend until smooth.

Pour custard mixture into an unbaked 9 inch, deep dish pie shell.

To make streusel, using a mixer, cream butter and both sugars together until creamy.  Add flour, salt and spices and mix until crumbly but not overmixed.  Set aside.

Bake pie for 15 minutes.  Remove from oven and sprinkle the streusel, evenly over the pie.

Reduce oven temperature to 350 and return pie to oven and continue to bake for 45 to 50 minutes or until a knife inserted in the center comes out clean.

Remove from oven and allow pie to cool completely on a wire rack before serving.

NOTE:  Do not use "pumpkin pie mix" in this recipe. 

NOTE: This pie can be made with cooked butternut squash if you do not have access to pumpkin.

NOTE:  If you do not have access to pumpkin pie spice you can use 1 teaspoon of ground cinnamon, 1/2 teaspoon ground ginger, 1/4 teaspoon ground nutmeg, 1/4 teaspoon ground allspice, 1/4 teaspoon ground clove.

Enjoy!

Monday, October 10, 2016

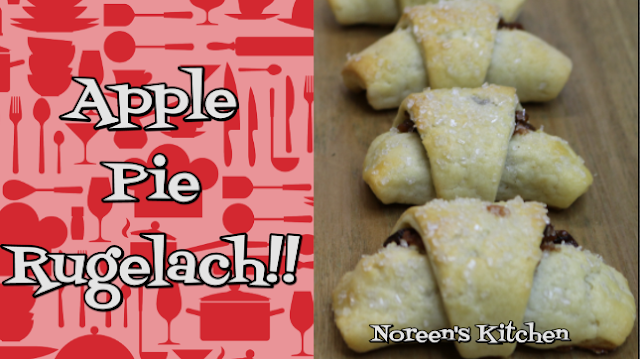
The Apple of my Pie! Apple Pie Rugelach Cookie Recipe! Noreen's Kitchen

Noreen's Kitchen, Copyright 2016


Today we have a fun and delicious collaboration to share!  I am teaming up with Jac, from the Vegetarian Baker channel to do a couple of videos in celebration of National Cookie Month!  Did you know there was a national cookie month?  Well there is!  And October is the auspicious occasion!  So, to honor all things cookie, we are teaming up to share a couple of pie inspired cookie recipes.  Jac will be sharing his pumpkin pie cookies and I am sharing these amazing, flaky, rich and delicious apple pie rugelach!

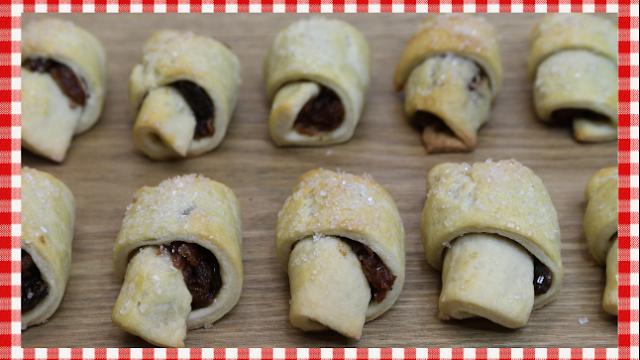
If you are not familiar with what rugelach is, it is a little Jewish or Israeli cookie that when translated to English means "little twist".  they typically look like a crescent and the original version is filled with cinnamon, sugar and ground nuts.  However they fillings can run the gamut.  Some of my favorites include raspberry or apricot jam with ground nuts and cinnamon, Nutella or hazelnut spread, brown sugar, you name it!  If you can roll it up in the dough, you can make these cookies any way you like them.

This dough is so amazing and reminds me very much of the dough for my grandmother's kifli recipe.  It is a very short dough, meaning it has a lot of fat and a little flour, just to hold it all together.  A dash of sugar and a splash of vanilla extract add loads of delicious mild flavor to this cookie dough that will be enhanced by the filling you choose to put inside.    This is very easy to make in the mixer, just cream the fats, add the flour and flavorings and blend till it comes together.  Then I wrap the whole thing in some plastic and stow it in the fridge for at least a half hour.  You can make this dough a couple days in advance in preparation for a big baking marathon and have it all read to go.

Noreen's Kitchen, Copyright 2016


When you are ready to make the cookies, divide the dough in four and only keep out one portion to work with.  Roll it into a 12 to 14 inch circle then using a pastry or pizza cutter, divide the circle into 12 wedges.  These will be your cookies.  

I made a filling out of shredded apples, golden raisins, sugar and apple pie spice.  Sauteed in a bit of butter and let it all cook down into an beautiful thick mixture that was perfect for filling my rugelach.    I allowed the filling to cool while the dough was in the fridge.  You just don't want the filling to be hot otherwise it will melt all that butter and cream cheese in the dough.

Then you fill you cookies by adding a scant teaspoon to the wide end of each wedge and the roll up like a crescent roll.  Place each cookie on an awaiting baking sheet lined with either a parchment or a silicone mat.  I brushed the rugelach with egg wash and sprinkled with some coarse crystal sugar for crunch and decoration.  Baked them for 15 to 18 minutes until they were lightly browned on top and bottom.  Then let them cool on the baking sheet for five minutes before removing to a rack to cool completely.

These cookies are super delicious and you are going to love them.  They taste like apple pie, of that you can be sure and they will disappear quickly.  

I only made half of the dough because that is all the filling I had.  The rest of the dough was wrapped and placed in the freezer.  It will be good for up to six months but I will be using mine sooner.  Just thaw in the fridge for a day or so when you want to use it and proceed as usual.  

Noreen's Kitchen, Copyright 2016


I hope you will check out the Vegetarian Baker Channel!  He has so many delicious vegetarian versions of awesome recipes I know you will love it!  Hit is subscribe button and show him some YouTube family love!  Links can be found below!  His pumpkin pie cookies look like they will be amazing!

I hope you give these apple pie rugelach a try and I hope you love them!


Happy Eating!

You can find a printable version of this recipe on my website here: http://bit.ly/2dJX8VN

Click to go to the Vegetarian Baker Channel:  http://bit.ly/2dSqK1q

Jac's Pumpkin Pie Cookie Video Here: http://bit.ly/2e7PSpa

You can see how I made these cookies in my YouTube video here:


Noreen's Kitchen
Apple Pie Rugelach

Ingredients

Dough
1 brick (8 ounces) cream cheese
1 cup (2 sticks) butter, cubed
1 cup sour cream
4 ½ cups all purpose flour
¼ cup granulated sugar
1 tablespoon vanilla extract
1 teaspoon salt (optional)

Filling
3 medium apples, peeled and grated
½ cup golden raisins
½ cup granulated sugar
¼ cup (1/2 stick) butter
2 teaspoons, apple pie spice blend
1 egg
1 tablespoon of water
Crystal sugar for garnish

Step by Step Instructions

Using a stand mixer, cream butter and cream cheese until smooth and fluffy.

Add sour cream and beat until incorporated.

Add sugar and vanilla and whip to combine.

Add flour and salt and mix until incorporated.  Do not over mix.

Wrap dough in plastic wrap and refrigerate for at least half an hour.  Longer is better. 

To make the filling:

Melt butter in a skillet over medium heat.  Add apples, raisins, sugar and spices and stir well.  Cook for 10 minutes, stirring occasionally to prevent burning.  When all the water has cooked out and the apple mixture has thickened, remove from heat and allow to cool to room temperature.

Preheat oven to 350 degrees.

Divide dough into four equal portions.  Return three to the refrigerator.

Roll out your working portion of dough into a 12 to 14 inch circle.  Using a pastry or pizza cutter, divide the circle into 12 even wedges.

Spoon the apple filling onto the dough using a scant teaspoon of filling for each wedge of dough.  Roll from the wide end like a crescent roll into the cookie.

Place the rugelach onto a baking sheet lined with a parchment or silicone mat.

Beat egg and water together to create an egg wash.

Brush each cookie with the egg wash evenly.  This will give the cookies a nice sheen.

Sprinkle each cookie with crystal sugar if desired for crunch and garnish.

Bake cookies, one pan at a time for between 15 and 18 minutes or until lightly golden brown on the top and the bottom.

Remove from oven and allow to cool on the baking sheet for five minutes before removing to a rack to cool completely.

Store these rugelach in an airtight container for up to a week.  I promise they won’t last that long.

I only made two dozen cookies with the amount of filling shown in this recipe.  I froze the remaining dough.  You can tightly wrap the dough in plastic wrap and then place it in a freezer bag and freeze for up to six months.


Enjoy!


No Bake Coffee & Cream Pie!! Noreen's Kitchen Piesgiving!!

Noreen's Kitchen, Copyright 2016


It's here!  The very first pie of the 2016 Piesgiving celebration!  This year it is doubly auspicious because it is also Torani Friday!  To kickoff our pie-palooza, we are starting with a simple, no-bake refrigerator pie that I am calling "coffee and cream pie".  We are going to use some ingredients from the grocery store that will help you to throw together a pie in no time, that everyone will love!

This starts with a chocolate cookie crumb pie shell.  I used the nine inch size.  You are always free to make your own from chocolate wafers, but this was so simple and I wanted to make this a pie you could make in a flash, and this one qualifies!  I also used two, four serving size boxes of instant vanilla pudding mix along with 2 cups of heavy cream (you don't want to sub out half and half here or the filling will not set properly), some strong brewed coffee and a shot of Torani coffee liqueur flavored syrup.  If you don't have the syrup, you can add a shot of Kahlua or other coffee liqueur or you can leave it out if you like.   


Noreen's Kitchen Copyright 2016


The ingredients were all whipped together using my hand mixer fitted with the wire whisk attachments until the mixture was thick and creamy and held a stiff peak.  Be sure not to over beat or you will end up with an unpleasant butter pie.  

I poured the mixture into the cookie crust shell and smoothed it into a swirl.  Then I sprinkled instant espresso powder on top of the pie as a nice decoration as well as a flavor booster.   The pie needs to be refrigerated for at least two hours before serving, but overnight is best.  It will cut much more easily, the longer you chill it.

You can choose to decorate the top with swirls of freshly whipped cream topped with chocolate covered espresso beans if you like.  I chose not to this time because I thought the pie was sweet enough and rich enough on it's own.  You should go for it and gild the lily as much as you like!


Noreen's Kitchen, Copyright 2016


There are more pies coming for Piesgiving!  14 to be precise!  So please stay tuned to my channel to see what pie goodness I have planned to share with you this year!  I hope you give this coffee and cream pie a try and I hope you love it!

Happy Piesgiving!

You can find a printable version of the recipe on my website here:
http://bit.ly/2dzBNBG


You can see how I made this in my YouTube video:


Noreen's Kitchen
No Bake Coffee & Cream Pie

Ingredients

1, 9 inch chocolate cookie pie shell
2-4 serving boxes, instant vanilla pudding
2 cups heavy cream

1 cup strong brewed coffee
¼ cup Torani Coffee Liqueur syrup (optional)
Instant espresso powder for garnish

Step by Step Instructions

Pour heavy cream, coffee and syrup into a large bowl.  Sprinkle pudding mix over the liquid ingredients.

Using a hand mixer, beat the mixture on now for one minute to incorporate then increase speed to high and whip until doubled in size.

Pour the pudding mixture int the pie shell and smooth evenly.

Sprinkle the top with espresso powder and add chocolate shavings if desired for garnish.

Cover and refrigerate for at least four hours before cutting and serving.


Enjoy!


Gearing Up for Holiday Baking!! Perfectly Pumpkin Pie Spice & Baking Blend!!

Noreen's Kitchen Copyright 2016


You asked for it!  Here it is!  I have recently used my homemade pumpkin pie and baking spice blend in a few recipes and the response to share was overwhelming!  

This is super easy to throw together with spices you already have on your spice rack or pantry shelf.  This gives you another opportunity to run through your spice supply and always have something fresh and delicious available for holiday baking!  This spice blend will not disappoint!  It is the perfect combination for using in pumpkin pie, but so many other things like pumpkin bread, muffins, butter, latte, you name it!

I also have a very special announcement to share with you.  I have been keeping this a secret for several months.  6 to be exact.  I will soon be published in my first nationwide publication.  Molly Green Magazine contacted me and invited me to write an article and share recipes in their winter edition which will be on new stands at the beginning of December!

I was invited to write about "gifts in a jar"  I focused on homemade spice blends for both sweet and savory preparations.  These are some blends that I have already shared here on my channel and some that are brand new and I will be sharing in the future.  The pumpkin pie spice and baking blend is one of those that will be featured in the magazine.

Noreen's Kitchen, Copyright 2016


If you are not familiar with Molly Green Magazine, they are focused on homesteading and homeschooling.  They are a Christian publication and strive to help people make a better, self sufficient life for themselves.  I hope that you will seek out their magazine and see if it will help you in your own life!  You can find them on their website to learn more about what they are all about! http://bit.ly/2cTAqMh

I want to take this time to thank each and every one of you for being a part of this community and my journey.  For eight years I have shared videos, recipes and myself and my family with you.  We have become our own version of a family, right here on the internet.  I have shared triumphs and failures with you all.  Many of you have gone out of your way to share your life with us as well.  I appreciate each and every one of you and what you bring to our, ever growing table!  Keep it up and who knows where the journey will take us all!

I hope you will enjoy making the pumpkin pie spice and baking blend for yourself and using it in your holiday baking and cooking!  I think this is also an excellent holiday gift or pre holiday gift for the foodies in your life so they will be already for their marathon baking sessions for Thanksgiving and Christmas and everything in between!

I hope you give this spice blend a try and I hope you love it!

Happy Baking!

Get a printable version of this recipe on my website:

You can see how I made this in my YouTube video here:


Noreen's Kitchen
Perfectly Pumpkin Pie
Spice and Baking Blend

Ingredients
4 tablespoons ground cinnamon
1 tablespoon ground ginger
1 tablespoon ground allspice
1 teaspoon ground nutmeg
1 teaspoon ground clove


Step by Step Instructions

Combine all ingredients in a mason jar and give a good shake.  This will make approximately ½ cup of spice. 

Keep in a dark, cool, dry place.  Use as you would when a recipe calls for pumpkin pie spice.

Enjoy!