}]; Noreen's Kitchen: Noreen's Kitchen
Showing posts with label Noreen's Kitchen. Show all posts

Wednesday, February 15, 2017

Low and Slow is the Key to Success! Tasty Slow Roasted Brisket Recipe! Noreen's Kitchen


Time to prepare for another in our bulk cooking series.  This time around I am using a beef brisket, slow roasting it to perfection and then see how many meals for four we can get out of it.  I have slow roasted brisket in a video many years ago.  Time for an upgrade!  Brisket can be intimidating to some people, simple because of the nature of the cut.  It is not forgiving and if done wrong, it can be be an awful experience.  There are a few tricks to doing it just right.  First off, low and slow is imperative, secondly, the way you slice this cut of meat is going to make all the difference in whether you have a melt in your mouth slice of beef or a chewy, stringy and tough piece.  Today I am going to show you the right way to achieve the perfect brisket!

I have around a 10 pound brisket, with a trimmed fat cap.  You want to make sure your cut is trimmed well.  Some brisket can come with a very fatty layer, which can be unappealing after it is cooked.  You don't want the fat to be trimmed away completely, because the fat helps to flavor the meat and keep it moist and delicious.  You can always discard it when serving.  Over all, I like to leave about a half inch if it is not already trimmed well.


Like my Calphalon roasting pan?  Check it out here: http://amzn.to/2kKzb1Q

Next is the seasoning and aromatics.  I have created a "rack" of vegetables to place the brisket upon.  Carrots and celery are great for this.  I also thick cut a yellow onion and scattered it around the roast.  For seasoning, I have generously spread some of my homemade dry onion soup mix.  If you would like to see how I made that, check out my video here:  http://bit.ly/2kQoLRo


I also added some bay leaves and crushed rosemary to the seasoning as well.  I added about 3 cups of water to the bottom of the roasting pan, then covered the roast with parchment and a double layer of foil.  The brisket was roasted in a 300 degree oven for 7.5 hours then allowed to rest for an additional 2 hours before slicing.  Allowing the brisket to rest for a long period is going to be helpful when slicing.  

To slice a brisket properly you will want to ascertain the grain of the meat.  Slicing straight across the meat is not the way to go.  You want to slice against the grain.  To do this you will want to slice diagonally from the narrow end of the brisket to the wide end.  This will help you to know that you will get nice short, tender, melt in your mouth pieces of meat instead of long stringy inedible pieces.

This brisket is a delicious treat.  It does cook down a bit so in the end, I would guess that we have about 7 pounds of edible meat.  We enjoyed our brisket the first night with mashed potatoes, gravy made with some of the drippings and steamed veggies.  We will be sharing other options to use the leftovers.  This makes for great budget cooking and freezer banking for nights when a long cooking process is out of the question.  


The leftover meat from a  tasty brisket is great for bbq beef sandwiches, taquito filling, burritos, enchiladas, tacos, tostadas, hot beef open faced sandwiches, Chicago style beef sandwiches, beef pot pie, beef and barley soup and so much more!  You can even make a red flannel, roast beef hash with these leftovers and it will be amazing!  Stay tuned to see what I come up with!  I am confident we will be able to get 4 to 6 meals out of this roast.    Not as many as we did from the chicken, but a good number nonetheless.

I hope you give slow roasting a brisket a try and I hope you love it!

Happy Eating!

You can see how I made this in my YouTube video here:


You can find a printable version of this recipe on my website here: http://bit.ly/2kyEuAT


Noreen's Kitchen
Slow Roasted Beef Brisket

Ingredients
1 whole beef brisket 8 to 10 pounds
4 carrots roughly cut
4 stalks of celery roughly cut
1 large onion, thickly sliced
½ cup dry onion soup mix
1 teaspoon dried, crushed rosemary
4 bay leaves
4 cups water

Step by Step Instructions

Preheat oven to 300 degrees.

Place celery and carrots in the bottom of a deep roasting pan.

Place brisket, fat cup up, on top of the carrots and celery.

Arrange onion slices around the brisket.

Sprinkle onion soup mix generously over the top of the brisket.  Sprinkle rosemary and bay leaves on top as well.

Pour water into the bottom of the roasting pan.

Cover with parchment if desired then double seal the pan with aluminum foil.

Roast for a minimum of 6 hours and check to see if the brisket is done.  If not return it to the oven for an addition hour to hour and a half. 

When brisket is tender all the way through a the thickest part of the meat, remove from oven and allow to rest for two hours before slicing.

When slicing the brisket, you will want to use a sharp carving knife and slice diagonally across the grain of the meat.  When you look at your slice it should not have long strings of meat running horizontally. It should have a short grain that runs vertically across the slice.  Slicing diagonally will achieve this.  Start at the narrow end of the brisket and slice your way back toward the wider end diagonally.  This will give you the perfect, tender, melt in your mouth experience you are going for.

Leftover brisket should be stored in an airtight container in the refrigerator for no longer than ten days.  It can also be frozen in sealed containers or zip top freezer bags for later use.

ENJOY!

Check me out on social media!

Facebook:    http://on.fb.me/12bdibt

Twitter:         @noreenskitchen

Instagram:    http://bit.ly/12bdqrp

Google +         http://bit.ly/1o5GMYy

Have a question for me?  Send me an email:
info@noreenskitchen.com

Monday, February 13, 2017

Sweets for your Sweetheart! Cupid's Valentine Bark Recipe!


One last fun Valentine treat idea before tomorrow!  Here is some delicious and simple, Cupid's Valentine bark! You can throw this together tonight and have it read to enjoy, serve or share tomorrow!  If you are able to take homemade treats this would be a great idea for a class party or even a church event.  Sweet and stunning, this bark is delicious and super pretty!  Perfect for your Valentine or sweetheart and kids will love getting in the kitchen with you to help make this super simple treat!


Just like any other "bark" this one starts with white chocolate chips.  I have also used candy melts in red and pink.  Get those melted in the microwave on thirty second bursts, stirring after each until you have smooth and creamy melty goodness!   I like to add about a tablespoon of coconut oil when I use baking chips to help encourage the melting process and help it to be nice and smooth.  Sometimes those baking chips can have emulsifiers and additives that preclude proper melting, but a bit of coconut oil, or if you don't have that, some shortening will work as well.  


Prepare a baking sheet.  I like to use non stick foil then spray that with some cooking oil spray.  I prefer coconut oil spray but whatever you have will work great.  Pour the white chocolate onto the sheet and spread evenly, but not too thin.  You don't have to worry about covering the whole pan.  Just make a nice even layer.  Then take the two colored chocolates and drizzle how ever you like.  Let your inner Jackson Pollak out and see what happens.  Then I took a coffee stir stick and ran it through up and down then back and forth.  Just to give it that pretty, draggy look that you see in professional candies.  Make it look nice and swirly.  But don't swirl too much or you will end up with a muddy mess.

Now for the fun part!  I found some pretty little pink, heart shaped marshmallows that I tossed on the melted chocolate.  Then I added some pretty candy sixlet pearls in pink, blue, white and black.   Toss those into the chocolate with some force to embed them in the chocolate so they will set in there and not fall off when you break this up.  Then I sprinkled a generous amount of red and white sugar and red, pink and white pearl nonparels, along with some little candy "x's and o's".  Such a fun and festive look!  I popped this pan in the fridge for about an hour to set.

Breaking up the bark is easy, but since we have added the pretty marshmallows, I want to be careful to have full pieces  that don't pull those apart.  Break this up the best you can for pretty shards of deliciousness!  I packaged mine up in some pretty paper boats then wrapped them in cello bags.  I got those kits at the big box store I also put a few pieces in cupcake papers for fun.  This would be a great idea for serving at a party or at a school or church function.  


I hope you give this Cupid's Valentine bark a try and I hope you love it!

Happy Eating and Happy Valentines Day!

You can see how I made this in my YouTube video here:


A Printable version of this recipe is available on my website:  

Noreen's Kitchen
Cupid’s Valentine Bark

Ingredients

4 cups white chocolate chips
1 cup red candy melts
1 cup pink candy melts

Colorful mini marshmallows (heart shaped)
Assorted sprinkles
Coated chocolate candies/pearls

Step by Step Instructions

Place the white chocolate chips in a large, microwave safe bowl.  Heat in the microwave on high in 30 second bursts, stirring after each until the chocolate is smooth, creamy and free from lumps.

Melt the candy melts in microwave safe containers, I put mine in pint mason jars.  Melt on 30 second bursts, stirring after each until the candy is smooth, creamy and free from lumps.

Prepare a baking sheet by lining with foil (I like the non stick type) and spraying it well with cooking oil spray.

Pour the white chocolate onto the baking sheet and spread out in an even layer.  Don’t worry too much about covering the entire surface of the pan, that may be too thin. 

When the white chocolate is spread, take the colored candy melts and drizzle haphazardly over the white chocolate.  Let your inner Jackson Pollak out to play.  Just drizzle away with one color then move on to the next. 

When you have done drizzling, take a skewer, a coffee stirrer or a butter knife and drag it gently through the chocolate in one direction up and down then the other.  So the swirls become pulled and beautiful.  Be sure not to swirl too much because that will muddy the colors.

Now you can top your bark with marshmallows, sprinkles and chocolate coated candies to your heart’s content. 

When you are done decorating, place the sheet pan in the refrigerator for 1 hour to allow the bark to set completely.

When the bark is set, break into beautiful shards and package in pretty bags to give away to your sweethearts!


Business Inquiries can be sent to:
info@noreenskitchen.com

Sign up for my weekly newsletter and get exclusive recipes, video tutorials and articles!
http://eepurl.com/TZCV5

Don't forget to subscribe!  New videos Every Monday, Wednesday, Friday and Sunday!
http://bit.ly/17JVMTP

Subscribe to Rick's Tips Channel for Home Improvement and DIY Tips!  New videos every Saturday!
http://bit.ly/1ixCK8W

Check me out on social media!

Facebook:    http://on.fb.me/12bdibt

Twitter:         @noreenskitchen

Instagram:    http://bit.ly/12bdqrp

Google +         http://bit.ly/1o5GMYy


Wednesday, January 18, 2017

Homemade is Best! Old Fashioned Chicken Soup Recipe!!


Today we wrap up our budget buster bulk cooking chicken journey.  We have made chicken and stuffing casserole, buffalo chicken pizza, Hawaiian BBQ chicken pizza, salsa verde, sour cream chicken enchiladas, chicken citrus super food salad of course our initial meal of roast chicken dinner and now for the grand finale.  There will be nothing left after this!  Taking the carcasses of the roasted birds as well as the bones and skin from what we have been using for all the rest of the goodness we have made and we are now making a delicious, nutritious and simple chicken soup.  

This soup is so easy to make and really you are making a good quality bone stock that will have shreds of chicken meat that will shed from the bone over the long cooking time.  I did not add anything fancy here.  Only simple aromatics such as celery, onion and carrot as well as a half a lemon.  I always like to add lemon to my chicken soup or stock because I think it helps to clarify the stock and reduce the "scum" that can sometimes build up while cooking.


I tossed everything in the pot from the freezer, added the veggies and a handful of seasonings.  I like to add parsley, salt, peppercorns, sage, bay leaf,marjoram and a few other spices.  You can add what you like, I would recommend going easy on the salt at the beginning.  Over time and the cooking process the flavors can concentrate.  You can always taste for seasoning in the end, and adjust to your taste.  

I cooked my soup for three hours on a low simmer.  Then I did my best to get all the bones and cartridge out of the pot.  This can be a daunting task, but keep at it.  Just when you think you get it all, another one pops up.  It can be maddening, but make sure to tell your family to watch for bones.  They can be small, but they are soft, and chewy most won't cause a problem.  I just like to let everyone know.  Don't give this to your dogs though because even a small chicken bone can splinter and cause a trip to the emergency vet and nobody wants that!

I don't ever cook my noodles in my soup.  I always cook them separate.  We each fix our bowls by putting the noodles in the bottom then ladling the soup over the top.  This way everyone gets their preferred soup to noodle ratio!  I much prefer to do things this way because I don't like the noodles in leftover soup.  They swell and get mushy and very unpleasant.  You should do what you like best.  If we were going to eat this all at one sitting then I may consider cooking them right in the soup pot, but this way I can use the leftover soup for yet another meal.

In the end, we had a 6 quart pot of delicious chicken soup that was chock full of meat and veggies.  We at well that night and we also had the soup for lunch the next day.  Then I strained the meat from the stock and allowed the stock to cool before putting it in the fridge.  I went through the remaining chicken to fish out all the bones and we fed it to our pets over a few days time as a treat.  There were 2 quarts of "jellied" stock left that I froze for another time.  Everyone saw benefit from these two chickens.  Even our dogs and cats!  I have some stock left for another use later down the line and overall I think we did great with two birds.  


I hope this encourages you to challenge yourself and see how far you can make two chickens last for your family.  Remember my chickens were 7 pounds each or there abouts.  You want to keep that in mind.  I don't think we could have stretched it this far if they had been smaller.

I hope you give this bulk cooking, chicken journey a try on your own and I hope you love it!

Happy Eating!

You can get a printable version of this recipe on my website here:


You can see how I made this in my YouTube video here:


Noreen's Kitchen
Homemade Chicken Soup

Ingredients
Carcasses of 2 roasted chickens including any bones and skin saved and frozen.
1 large onion, chopped
4 carrots, cleaned and chopped
4 stalks of celery with leaves, chopped
4 cloves of garlic, minced
2 bay leaves
1 teaspoon black pepper corns
2 tablespoons salt
1 teaspoon dried marjoram
½ teaspoon dried thyme
2 tablespoons dried parsley
½ of a large lemon, quartered
Cold water to cover

Step by Step Instructions


Place all ingredients into a large stock pot, that is at least 6 quarts in size.  If you prefer, you can place the peppercorns into a cheesecloth pouch to make it easier to remove.


Cover the contents of the pot with cool water.  Bring to a boil over medium heat, then reduce to a simmer.  Allow soup to cook for 3 to 4 hours or until the meat has fallen from the bone and the bones are clean.

Turn off the heat and allow the soup to sit for 15 to 30 minutes.

Remove all the bones from the soup the best you can.  It may be impossible to get all of them because small rib bones are hard to fish out.  Just be sure to let your family know to be aware there may be small bones.

You can remove any large pieces of meat and shred them.  Then return them to the pot.

Cook noodles of your choice or rice to go along with the soup.  I like to do this separately because leftovers with noodles or rice are not that great.

Serve soup by placing rice or noodles in the bottom of each bowl then ladling the soup over.  Add more parsley to each serving and you can also sprinkle with grated parmesan cheese if desired and lots of cracked black pepper.  That is my favorite!

You can store any leftover soup with the chicken and vegetables in it for another meal or you can strain out the chicken and veggies and have chicken bone stock to freeze for another use. 

I strained my soup and fed the veggies and shredded meat that was left to my pets.  Nothing went to waste with the exception of the bones. 

The stock is “jellied” and perfectly delicious.  We will use this in another meal soon.


Monday, January 16, 2017

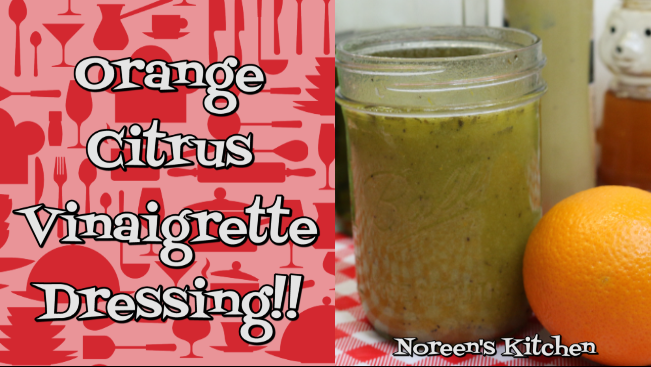
Fresh and Flavorful!! Orange Citrus Vinaigrette Salad Dressing!!


Today I wanted to share with you this delicious, orange, citrus vinaigrette salad dressing that was used in our chicken and citrus super food salad that we shared a couple of days ago!  Vinaigrette dressing may be a foreign thing to some people and maybe you just never thought about making your own dressing.  I am here to tell you that this fancy sounding delight is not only easy, but you won't ever want to buy bottled dressing again!  

Basic vinaigrette starts with a simple ratio.  All you have to remember is this.  2 to 1, oil to vinegar.  I have used 1/2 cup of white wine vinegar and 1 cup of extra virgin olive oil.  From there it is up to you.  Yes, you can simply sprinkle some salt and pepper in there and be done.  However vinaigrette can be so much more.  With the proper building blocks you can go just about anywhere.  Every cuisine has their own version of this simple and delicious dressing.


Today we are going a bit more Mediterranean with our dressing.  We are adding the juice and zest of one small orange along with about a tablespoon each of honey and Dijon mustard.  We are seasoning the dressing with a good pinch of salt, cracked black pepper and dried tarragon.  This will give things a delicious herbaciousness that will amplify the flavor profile and stand up to the sturdy flavors in the salad I intend to use this on.  


Don't limit yourself to what I have shown here.  You can switch out the white wine vinegar for red wine vinegar, rice wine vinegar or balsamic.  You can switch up the olive oil for a more neutral oil like sunflower or safflower or even grapeseed oil or light sesame oil.  You can switch out the orange for a lemon, lime, grapefruit or if you are brave and daring, pick up a Buddha hand and squeeze that!  You can use bottled yuzu juice if you like or even the juice and zest of a pomello.  The possibilities are endless.  Make this dressing to suit your preferences and your likes.  Don't like tarragon?  Add basil, oregano, parsley, or a bit of Italian seasoning or Herbes De Provence.  You can add salt and pepper to taste.  You can change the sweetener.  I used honey, but you can use regular sugar, brown sugar, coconut sugar, molasses, maple syrup, agave nectar, brown rice syrup or, no sweetener at all. I find that the dressing needs a bit of sweet to offset the bold acid nature it has, but you be the creator of your dressing.  Just be sure to taste as you go to be sure it is what you like.

I hope you give this simple and delicious orange citrus vinaigrette dressing a try and I hope you love it!

Happy Eating!

A printable version of this recipe is available here: http://bit.ly/2iuvBfo


You can see how I made this in my YouTube video here:  


Noreen's Kitchen
Orange Citrus Vinaigrette


Ingredients
½ cup white wine vinegar
1 cup extra virgin olive oil
1 tablespoon honey
1 tablespoon Dijon mustard
¼ cup fresh orange juice
1 tablespoon fresh orange zest
½ teaspoon salt
½ teaspoon cracked black pepper
1 teaspoon dried tarragon


Step by Step Instructions

Place all ingredients into a pint jar.  Place the lid on the jar and shake well.

Any leftovers should be stored in the refrigerator for up to two weeks. 

This dressing is great on salad or as a marinade for meat or as a dip for crusty bread as an appetizer. 


Friday, January 13, 2017

Start the Year Off Right! Citrus Chicken Super Food Salad!!


Today we are using up the very last little bit of shredded chicken from the two we roasted and making a super healthy, citrus chicken super food salad! I am inspired by Elaine's "big salad" a la Seinfeld but wanted to take a super healthy beginning of the new year, healthy goals approach here. 


This salad starts with some chopped, fresh kale and baby spinach, blended together along with a healthy handful of matchstick carrots. I usually put out all the goodies and have everyone make their own salad. That way everyone gets what they like. I prefer a little bit of everything and a tasty dressing!


I added some of the shredded chicken. I have about 1 1/2 cups left which may not seem like a lot, but it is the perfect amount for the four of us to have a great, healthy dinner salad with super boosted nutrition! 


I made up my salad using the greens and chicken along with some cooked and cooled quinoa, baby yellow, orange and red bell peppers which are filled with great vitamins, mineral and antioxidants. Then added some grape tomatoes and a healthy portion of grapefruit and orange segments. I used a canned citrus salad, packed in juice, with no added sugar, that I like to keep in my pantry. If you live where you can get citrus free or cheap, then I think that would be great! Oranges in my area, right now are almost $1 each! Horrifying! 

I added a handful of dried, organic, unsweetened cranberries for a sweet note along with a healthy sprinkling of seeds. A mixture of chia, hemp and sunflower. You can also add some walnuts or pecans or toasted almonds as well if you prefer or in addition to the seeds. 

I topped the whole thing off with a drizzle of a delicious orange citrus vinaigrette that I made and will share in an upcoming video! If you would like to see how to make the quinoa, let me know and I will be happy to share! 

This salad is the perfect light meal. It really is filling with the cooked grains and all the hearty greens. Using the rainbow as your guide for adding veggies and fruits really makes for a colorful, delicious and nutritious salad that everyone will love! If you don't like quinoa, you can always cook up some wheat berries which would also be great in this salad!


I hope that you give this citrus chicken, super food salad a try and I hope you love it! I also hope you love seeing how many delicious things we can make with just a couple of roasted chickens! Next up is using the bones to make some soup and stock for dinner and I can't wait to share that with you soon!

Happy Eating!


Thursday, January 12, 2017

Fresh Is Best! Sign Up for Zaycon Fresh and Get 20% off your First Order!


Sign up here for emails and notifications of Zaycon sales in your area!  http://bit.ly/Zaycon-Fresh 

Use coupon code BL20 and get 20% off your first order!

You can get great deals on ground beef, chuck roasts, steaks, whole chickens, chicken breasts, tenders and thighs, bacon, hot dogs, fish and more!  They always surprise me with their variety!  In the summer they even have fresh, locally sourced produce from time to time!  

In this video I am sharing how we picked up our Zaycon Fresh order of 80/20 ground beef, took it home and processed it.  We also got a little interview with our pick up guy Jerry!  Thanks to him for answering all our questions and being so awesome!

Here is some information about Zaycon Fresh that will help you know more about who they are:

How does it work?
You need food. Fortunately, our food tastes great.
You go online to ZayconFresh.com and place your order, your jaw dropping at how much great food you can get for such low prices.
On the day of your local Zaycon sales event, you bring your order confirmation to a designated location a short drive from your home, and you get your fresh, delicious, nutritious food!

That’s it, just three easy steps! And let’s be honest, that first step wasn’t even time-consuming.

We represent the greatest value in the food industry today. Here’s how we do it:

Combined Buying Power
We combine the buying power of many families together, enabling us to negotiate huge savings on food purchases for your family

Direct Farm-To-Consumer
We bring products direct from the farm / processor (or as nearly as direct as possible). The products are as fresh as if you had your own farm, but without all the chores


Sold By The Case
We sell food products only by the case. No extra costs for handling. And no more empty shelves in your pantry

Select Products
We sell only what we eat ourselves—high quality, healthy food. Our focus is on a select number of commonly consumed food items such as fresh meats like chicken, beef, turkey, pork and fish

Sales Event Model
Our unique sales event approach turns traditional food purchasing on its ear. Convenient, quick, organized—about 2 minutes and you never even need to get out of your car
OK, here’s a bit more info about us, because you seem so nice!
Zaycon Fresh is a privately owned company based in Spokane, Washington. The company was founded in 2009 with the simple mission to bring farm fresh meats direct to consumers at wholesale prices.

You see, we knew all the farmers who had the best stuff around. Thanks to our experience in the grocery industry, we knew how to quickly move that great stuff from point to point, preserving its freshness, taste, and nutrition.

So we asked ourselves: “Why are there middlemen involved? Why aren’t we just getting this food directly from the farms to the people who are going to eat it?”


That idea grew into the company we are today.

When we started off just a few short years ago, we offered only a few meats in a few areas. But thanks to the overwhelmingly enthusiastic response we’ve gotten from all of you, Zaycon has grown like wildfire!

We now offer a wider range of fresh foods to over 1,200 locations nationwide. If we have not been to your area yet, let us know and you can bet we’ll be there soon. And if we’ve already been through a dozen times, you know we’re coming back again, too.

If you are interested in signing up to find out how you can purchase Zaycon Fresh meats in your area, please use the link above!  

I hope you try Zaycon Fresh and I hope you love them!

Happy Eating!


Monday, January 9, 2017

Pizza Pizza!! Chicken Pizza Two Ways!!


Here is "Budget Buster Bulk Cooking Chicken Edition" meal number 3!  Chicken pizza two ways.  Technically this is going to be two meals because we will only eat one pizza's worth of pizza for dinner than the other for lunch the next day so this could technically count as two meals.  Not bad from one chicken breast's worth of shredded meat!  

This could not be simpler!  I used my Big Batch Pizza dough recipe that you can find here: http://bit.ly/1lTqltm.

I used my favorite homemade BBQ sauce to make a quick Hawaiian style chicken pizza with shredded chicken, sliced pineapple pieces and both mozzarella and cheddar cheese.  You can use whatever is your favorite BBQ sauce.  You can find my "Almost Sweet Baby Ray's" BBQ sauce recipe here:  http://bit.ly/1js1HTp


I also made a buffalo chicken pizza.  I make a traditional buffalo sauce using 1/4 cup of melted butter mixed with 1 cup of Frank's hot sauce.  Since that is a little on the thin side for a pizza sauce I wanted to thicken it up.  I mixed in 2 tablespoons of instant clear jel which is a modified food starch.  This is the instant kind and not the type for canning.  It immediately thickened up my buffalo sauce to a pizza sauce consistency and made it perfect for spreading on the pizza dough!  If you would like to give instant clear jel a try you can find the brand I use here:  http://amzn.to/2i7BFsz  This is Ultra Gel brand, it is non GMO and really works great!  You can use it in both hot and cold applications and this is also what I use to stabilize whipped cream.  


The buffalo chicken pizza was simple!  Just spread the buffalo sauce on the pizza dough, add mozzarella cheese, shredded chicken and cheddar cheese on top and done!   Easy!  This was a hard night for me getting these pizza's in the oven!  So the fact that I even got to make a video was astounding.  In the end, we enjoyed pizza night with super puffy pizza due to the fact that the dough had to sit for a while before I could get to it!  Life happens.  Nonetheless, the pizza was delicious!

Don't let my pizza be your limit. You can make yours any way you like.  In the future, I would add sliced red onion and bell pepper to my Hawaiian chicken pizza and the buffalo chicken pizza would be great with some candied jalapenos added to it!  Let your imagination be your guide as well as the leftovers in your fridge!  You can put just about anything on a pizza and your family will be super happy you made it for them!


I hope you give chicken pizza two ways a try and I hope you love it!  I also hope that this budget buster bulk cooking series on chicken is helpful to your wallet and your menu rotations!

Happy Eating!

You can see how I made these in my YouTube video:


Sunday, January 8, 2017

Quick and Easy Leftover Makeover: Chicken and Stuffing Casserole!


We are continuing on with our "Budget Buster, Bulk Cooking - Chicken Edition" series and using up some of the leftover chicken we roasted in a previous video!  Today we are making a delicious chicken and stuffing casserole. 

This casserole is quick to make and only uses two cups of chopped, roasted chicken.  I used one thigh, from which I removed the skin and bone and half of a breast.  This made the two cups I needed.  I sauteed some celery, onion and carrot along with a generous 8 ounces of fresh Crimini mushrooms in some butter.  When they were  just a bit soft and the onion was just a bit translucent, I removed it from the heat and added the poultry seasoning, chicken and one can of cream of celery soup along with 1/2 cup of milk.  At this point you can choose to add whatever else you like.  Be it a bag of frozen mixed veggies, some frozen peas or anything you like.  It is up to you.  

*A note about "cream of" soup:* I seldom use canned creamed soups in my recipes.  However there are some that I do use them in.  I prefer to make my cream soup from scratch, however this recipe is intended to be a quick weeknight meal and getting this on the table after a busy day is more important to me than making cream soup from scratch.  You have to pick your battles.  I make no apologies for using this convenience ingredient.  I don't use them often so I am perfectly comfortable using it here or in my tuna casserole or any other number of recipes that can be put on the table quickly.  That being said, If I were going to be doing a month's worth of bulk cooking and were going to need, for instance, cream of mushroom or chicken soup for several recipes, I would indeed make my own and use it for those casseroles to be prepared for freezing.  If I were going to make three of these chicken and stuffing casseroles, along with a few sour cream enchilada casseroles as well as some tuna casseroles then I would make the soup from scratch.  You need to do what is best for you.  I have recipes on my channel for homemade cream of chicken, cream of mushroom, cream of broccoli and cream of celery soups.  You can easily find them by doing a quick search using the search option at the top of my channel page.


When the mixture is well blended it was poured into an 8x8 baking dish.  I topped mine with some leftover stuffing mix that we prepared when we made the chicken.  I made two boxes on purpose so I would have enough leftover for the casserole.  You can make a box of your favorite stuffing mix or if it is after a holiday, you can use your homemade stuffing as a topping for this.  I prefer to use a leftover stuffing because it is much easier to break up and "spread" on top than a hot stuffing.  You use what you have available and just plop it on in little spoon fulls on top of the chicken mixture and it will be fine.  

This was baked, uncovered for about 30 minutes until bubbly and a bit crispy on top.  Then we allowed it to cool for about 5 minutes before serving.  It was delicious!  This recipe is a pretty standard throwback to my youth and many people still enjoy this today in one form or another.  A Thanksgiving leftover meal would not be complete in our house without this dish.

So we now add one more recipe using our chicken to our budget buster bulk cooking series.  I plan on getting at least three or four more meals out of those two chickens.  I am up to the challenge.  You will be amazed at what you can do with just a little bit of meat!  


I hope you give this chicken and stuffing casserole a try and I hope you consider doing some bulk cooking of your own and I hope you love it!

Happy Eating!


You can get a printable copy of this recipe on my website here: http://bit.ly/2i5WzF7

You can see how I made this in my YouTube video:


Noreen's Kitchen
Budget Buster Bulk Cooking
Chicken & Stuffing Casserole


Ingredients

2 cups cubed, cooked chicken
2 tablespoons butter
1 cup onion, diced
1 cup celery, diced
1 cup carrot, diced
2 cups fresh mushrooms, sliced
1 can cream of celery soup
½ cup milk
1 teaspoon poultry seasoning
3 cups leftover stuffing or 1 box prepared stuffing mix.


Step by Step Instructions

Preheat oven to 350 degrees.

Melt butter in a skillet.

Sautee all vegetables until tender crisp and onions are just beginning to turn translucent.

Remove from heat and add chicken and poultry seasoning and stir well to combine.

Add cream of celery soup and milk and stir well, being sure to evenly incorporate into a cohesive mixture.

Pour the chicken and vegetable mixture into an 8x8 inch baking dish/pan.

Top with stuffing.

Bake for 25 to 30 minutes or until bubbly and the stuffing is a bit crispy on top.

Remove from oven and allow to rest for five minutes before serving.

NOTE:  You can use any kind of cream soup that you like.  Cream of mushroom, onion, celery, chicken, chicken and mushroom or chicken an herb would be good choices.