}]; Noreen's Kitchen: Noreen
Showing posts with label Noreen. Show all posts

Sunday, October 9, 2016

The Frost Is On the Pumpkin and Autumn is Here! Pumpkin Bundt Cake Recipe


We are getting ready to celebrate the arrival of fall!  Many of you know that fall or Autumn is my very favorite season of them all.  Winter is a close second, spring coming in third and summer, well, you can have it!  Hate summer with a passion.  Who has time for hot, sticky, humid, weather and bugs?  Don't even get me started on sand in your pants from going to the beach.  Yes, Autumn is the perfect season!  Crisp mornings full of cool air with a tinge of wood smoke. Warm but not hot afternoons that are also not humid.  Colorful leaves falling to decorate the earth creating a red and gold carpet that rivals anything any artist ever envisioned.  Autumn is my jam.  

With autumn comes the welcomed arrival of pumpkin everything so I will just go there today with this delicious and simple, from scratch pumpkin cake that will have you dancing like Snoopy on top of her dog house!    

This pumpkin cake is very much the same as my banana cake only instead of banana we are using pumpkin and instead of a few spices we are using a lot of my homemade perfectly pumpkin spice blend.  I will eventually share this with you.  Regular old pumpkin spice will work fine.  If you don't have that, I will give you a simple formula in the written recipe that will be available on my website.  


This cake is simple and delicious.  It is moist and best of all it can be dressed up or down.  I have made it in a Bundt pan in this video because we took this to our monthly church pot luck a couple of weeks ago and this made for simple portioning.  The Bundt cake does take about twice as long as baking this in a 9 x 13 pan, but if you are going for looks, go for the Bundt!     You could also make this in two loaf pans or in two nine inch rounds,  three eight inch rounds or this will make 3 dozen standard cup cakes.  That's a lot of choices!  

This cake has no added oil.  Only the eggs and buttermilk to serve as the fat along with the pumpkin puree to keep the cake moist.  You won't miss it, I promise.  This cake is delicious just the way it is or you go simple and dust with powdered sugar or really go whole hog and slather on some cream cheese frosting.  This is best done if you have made the sheet cake version of this recipe.  Today I chose to go somewhere in between with a simple icing glaze flavored up with maple and vanilla extracts and enough powdered sugar and a splash or two of milk until I got the perfect consistency.  Then I draped that glaze right over the cake and let it dry.


This cake is delicious, any way you make it.  plain, frosted or glazed, you will have them coming back for more!

I hope you give this delicious pumpkin spice Bundt cake a try and I hope you love it!

Happy Eating!

You can get a printable version of this  recipe on my website here: http://bit.ly/2d0VTP0


You can see how I made this in my YouTube video:


Noreen's Kitchen
 Pumpkin Bundt Cake

Ingredients

1 cup pumpkin puree
1 cup buttermilk
2 eggs
1 teaspoon baking powder
1 teaspoon baking soda
1 teaspoon salt
1 tablespoon vanilla extract
2 teaspoons pumpkin pie spice
2 cups brown sugar
2 cups flour
Maple Glaze
2 cups powdered sugar
1 teaspoon vanilla extract
2 teaspoons maple extract
1 tablespoon maple syrup
2-4 tablespoons milk, to achieve thick icing

Step by Step Instructions

Preheat oven to 350 degrees.

Spray a 10-12 cup Bundt cake pan with cooking oil spray.

Whisk together pumpkin puree, buttermilk, eggs vanilla and sugar in a large bowl until well combined.

Add flour, baking powder, baking soda, spices and salt and wisk well to incorporate. 

Pour batter into prepared pan and distribute evenly.  Smooth top.

Bake for 55 to 60 minutes or until a wooden skewer inserted in the center comes out clean with no sign of wet batter.  The top will spring back when lightly touched.

Remove From oven and allow cake to cool in the pan for 10 minutes before removing to a wire rack to cool completely before glazing.

Prepare glaze by whisking together powdered sugar, extracts, syrup and 1 tablespoon of milk at a time until you get a thick but pour-able consistency that will cling to the sides of the cake.

Drizzle  the icing evenly over the cake being sure to glaze down the center.  Allow icing to dry in before slicing and serving.

Store cake in a cake dome or air tight cake keeper.  This cake will last for up to one week, but won’t last that long, if you know what I mean!  LOL!


Friday, August 19, 2016

Back to School Breakfast Hacks!! Pancakes & Bacon!!


Another installment in my Back to School Breakfast Hacks series.  Today we tackle pancakes and bacon!  We always seem to have homemade pancakes in our freezer because whenever I make pancakes, I always am sure to make extras.  Freezing pancakes is a great way to always be able to offer your family something warm for breakfast.  

I will be the first one to tell you that I used to purchase frozen pancakes.  The "good" kind though from the Dutch bakery.  However when inspecting the ingredients I discovered they were no better than the big name brands as far as mystery, unpronounceable ingredients, so  making them is the way to go for us.  

Let's face it, making pancakes is super easy. You can make them from your favorite mix or you can make them from scratch.  I am going to share with you my version of a very simple, and delicious pancake recipe that I like to call my 1+1+1 pancake batter.  This formula is simple.  For every cup of flour you use, you will need a cup of milk, one egg and a teaspoon of baking powder.  I also add a tablespoon of sugar and a pinch of salt.  Whisk it all together and get your griddle ready!  Pancakes any way you like them!  Add blueberries, strawberries, chocolate chips, bananas, walnuts pecans, you name it!  Whatever is your favorite is what you should make.  


If you are going to freeze these for later, then I recommend removing the pancakes from the griddle to a cooling rack.  Allow the pancakes to cool completely and then package as desired.  You can layer these between parchment or freezer paper in a plastic container on in a large plastic bag that you can just reach into and grab what you need or you can individually portion the pancakes as you like.  Our preference is three to a sandwich bag.  You can do what you like.  If you have smaller children, one or two may suit your needs better.  If you have teenage boys, well, then put the whole batch in one bag cause you know they are going to eat those Gethro Bodine style!

When the time comes to reheat, simply remove your short stack from the freezer bag and wrap in a paper towel.  Place in the microwave for 45 seconds to a minute and then enjoy.  You will want to test the time because all microwaves differ int their power and cooking intensity. 

While I was cooking the pancakes, I also had a couple pounds of thick cut bacon going in the oven.  Many of you know I like to cook my bacon on a sheet pan in the oven.  This makes life a lot easier and I don't have to tend a pan of splattering grease while trying to do something else.  I will tell you that I have never perfected cooking bacon in a skillet.  Can't do it to save my life.  Burns every time!  This sheet pan method is tried and true and  I learned it while spending many years in restaurant kitchens.  This is how they do it for buffets and breakfast rushes.  While they par cook theirs and finish on the grill per order, I cook mine all the way.  We like ours just after it has become crisp but before it gets too dark.  Baking it in the oven can help to regulate the perfect strips for your taste.  


When the bacon is done I remove it from the pan immediately and then place it on layers of paper towel to absorb any extra grease.  Allow them to cook completely then roll them up into the paper towel and place in a plastic freezer bag.  Pop them all in the freezer and reach in and grab what you want.  Re-heat for 10 to 20 seconds or whatever suits your fancy and you are good to go!

I hope you give this back to school breakfast hack for pancakes and bacon a try and I hope you love it!

Happy Eating!


You can see how I did this in my YouTube video here: http://bit.ly/2b4KOym


Tuesday, August 16, 2016

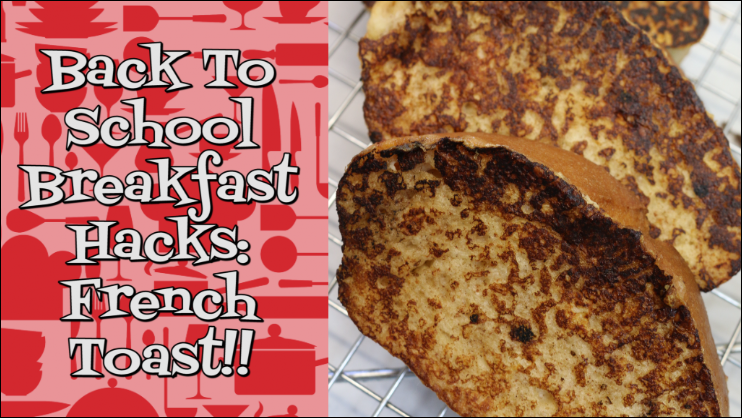
Back To School Breakfast Hacks: French Toast!!


Today we begin our back to school breakfast hacks tips!  First up, homemade French toast fast!  This is a super easy way to always have a great breakfast on hand for your family when days are busy, school is in session and sometimes we can be running late.  This is a great way to make your morning smooth and easy.  No need to always reach for a box of cereal!  You can get a protein packed meal into your family quick with a little forethought and preparation.

French toast is a favorite of many.  When you are firing up your griddle for a weekend breakfast, do a little planning ahead so you can make extra for the upcoming school week.  French toast is really great to make ahead and freeze.  Quick to reheat in the toaster, toaster oven or microwave and then a little syrup on top an you're good to go.  What child is going to say no to a hot slice of French toast on a busy school morning?  My guess is not a one!


A couple of tips for make ahead French toast that will help you on your way:  1) use real French or Italian bread that you slice yourself in about 1 1/2 to 2 inch thickness.  2) Dip, don't soak.  When you have time to make a super eggy delicious piece of French toast you can let that baby soak, but for frozen re-heatable, quick breakfasts you want to dip.  Allowing the bread to get too soggy will make these harder to re heat and less enjoyable to eat and 3) Remove from the griddle directly to a cooling rack so the bottom does not get soggy and they cool evenly all the way through.  That's it! 

When your French toast slices are completely cooled, pop each one into a plastic sandwich bag and toss those into a plastic container or freezer basket and freeze.  Then when you are ready to eat, simply remove from the freezer, pop into your toaster, toaster oven or microwave until done and add butter and syrup or fruit jam and enjoy.


This is one way that you and your family can enjoy a delicious, hot and nutritious homemade breakfast on even the busiest of mornings!  I will be sharing more back to school breakfast hacks in the coming days leading up to the new school year starting.  My girls have already started and I know in some parts of the country that is the case, however in others school will not start until after labor day.  It is never too late to be more prepared whether it is for school, work or anytime!

I hope you give this back to school breakfast hack for French toast at try and I hope you love it!

Happy Eating!

Monday, August 15, 2016

Sour Cream Biscuits! Not Your Grandma's Biscuit!


Today I want to share with you this simple and delicious twist on a good, old fashioned every day biscuit!  This sour cream biscuit is easy to make just like your traditional buttermilk biscuit, but this uses sour cream and milk instead of buttermilk.  This may be something you can make if you don't want to use buttermilk, don't have it available in your area or just don't feel like running to the store for a special ingredient.  

This is a very basic biscuit recipe.  I have developed this based on my traditional buttermilk biscuit recipe and it makes a big pan full.  You can easily cut this recipe in half if you like or you can make the whole think and only bake what you will eat and freeze the rest of the raw biscuits on a sheet for later use.  


As far as biscuits go this is pretty simple.  Flour, butter, leavener, a bit of sugar for a golden brown finish, milk and sour cream.  You could use all sour cream, but that will make this biscuit super heavy.  Adding the milk give this a lightness that you will enjoy.  Mix it up as you would any other biscuit, by cutting the butter into the dry ingredients then I like to mix the milk and sour cream before pouring into the bowl.  Toss with a fork to form a shaggy dough then dump  onto your well flour work surface.

The magic of flaky layers comes in how you handle the dough from here.  First you will want to press everything together.  Don't "knead" the dough.  Fold the dough into itself like you would fold a letter.  This is called laminated.  When you laminate dough you develop layer upon layer of flaky goodness.  When the dough is pressed out like this it will puff kind of like puff pastry, but not as high.  Biscuits are awesome when you prepare the dough like this.  I like to fold the dough into itself at least four times for maximum flakiness.

When you have folded the dough enough times for your liking, be sure not to do it to many times, which will result in a tough biscuit, go ahead and press or roll out into approximately at 10 x 12 inch rectangle.  You will want the dough to be approximately 1/2 inch thick.  Then cut out in the size you like.  This time I used a large, 4 inch biscuit cutter because I will be using these biscuits to serve with creamed chicken for dinner.  You can cut them smaller and my preferred size is the 2 1/2 inch cutter.  It makes perfect size biscuits for biscuits and gravy, serving on the side with eggs or stew or for eating out of hand with butter and jam.  


These bake in a moderate oven at 350 degrees for 12 to 15 minutes or until they are golden brown.  When they come out of the oven, I like to brush the tops with melted butter.  This will add flavor and ensure a soft top to your biscuits.  Allow these to cool for a few minutes before serving, even though they will be very hard to resist!

These biscuits are flaky, buttery, and have an amazing tang from the sour cream.  Different that that of the buttermilk.  These are simply delicious and I may say that I like them just a little more than my traditional recipe for buttermilk biscuits!  This recipe will definitely be showing up more often at my house!

I hope that you will give these sour cream biscuits a try some time soon and I hope you love them!

Happy Eating!

You can see how I made these in my YouTube video:


Noreen's Kitchen
 Sour Cream Biscuits


Ingredients
4 cups all purpose flour
1 cup (2 sticks) butter, cold and cubed
2 tablespoons baking powder
1 teaspoon baking soda
1 teaspoon salt
1 cup sour cream
1 cup milk
Melted butter for brushing on top


Step by Step Instructions

Preheat the oven to 350°F.

In a large bowl blend flour, baking powder, baking soda and salt.  Whisk together. 

Add cubed butter to the flour mixture and toss to coat and make sure the butter cubes are separated.  Using a pastry blender or two knives, cut the butter into the flour mixture until it resembles coarse crumbs, sand or coarse meal.

In a small bowl or jug, mix the sour cream and the milk together until smooth. Pour the liquid mixture into the butter and flour mixture.  Blend with a fork until it just comes together.

Flour your work surface liberally with more all purpose flour.  Pour the dough mixture out onto the flour.  Dust the dough with even more flour on the top.

Work the dough gently by folding into thirds, adding more flour as needed to keep a nice smooth and not sticky dough.  Press down and turn a quarter turn.  Fold into thirds again, press down, turn a quarter turn and flip the dough over, then repeat the folding and turning process twice more.

Roll or pat the dough out into a 12 x 16 inch (approximately) rectangle.  Then cut out using a biscuit cutter in the size desired.  Be sure not to twist your cutter.  That will cause your biscuits to be lopsided and also will inhibit them from rising to their fullest.

Place cut biscuits on a baking sheet that has been lined with parchment paper.

You can choose to place the biscuits close together or leave an inch or two between.  This is up to you, depending on whether or not you like your biscuits crispy all around the edges or soft. 

Bake for 12 to 15 minutes or just until golden brown on top and around the edges.

Remove from oven and brush with melted butter.  Allow to cool for 10 minutes before serving.


Get a printable version of this recipe on my website:  http://bit.ly/2aW06mn

Thursday, August 4, 2016

A Trip Down Comfort Food Lane! Southern Style Hot Hamburger Plate!


Let's do a little visualization exercise!  Close your eyes!  Remember back to when you were a child or young adult.  Your family went out to eat for a treat or celebration dinner or maybe it was just payday for dad.  You went to your favorite diner.  Ours was the Burlington Diner.  Then picture yourself being seated in your favorite booth with your brothers and sisters and mom and dad all around that wood grain formica table.  You asked your parents for a quarter to play a selection from the juke box.  As you flip through the pages on the table side selector, you fight with your sister about what song to choose.  Eventually your father takes the quarter away and plays Charlie Rich, The Most Beautiful Girl in the World.  UGH!  DAAAAD!!!  But you enjoy it anyway while you are choosing from the menu.  So much to choose from!  Burgers, club sandwiches, fried chicken, eggplant or chicken parm, my usual choice of roasted turkey, stuffing, and fries with gravy, but sometimes I looked forward to getting the Salisbury steak and always leave room for a parfait glass full of green gelatin with whipped cream or a scoop of vanilla ice cream with chocolate syrup.  Simple food, good company happy memories.  Ok, now you can come back to reality.

Today I want to share with you something that harkens back to that Burlington Diner salisbury steak.  Something that I have come to know, since moving to the south.  The hot hamburger plate.  Nothing special really except that this is good, old fashioned comfort food.  Not salisbury steak which has been fanicfied and dolled up with eggs, herbs and bread crumbs.  A mini meatloaf if you will.  No, the hot hamburger plate is the southern diner's answer to that fancier fare.  


Simple to make with good quality ground chuck, seasonings and an old fashioned pan gravy made with pan drippings, flour and beef stock.  Yes, this is comfort food at it's best.  The kind that you will find on any self respecting diner, truck stop or cafe menu in the south.  For that matter, we go to a burger joint that boasts this offering on their menu as well, served with fries instead of mashed and the burger is laid on top of a thick piece of Texas toast.  A feast fit for a king!  I almost always see a senior patron enjoying this selection every time we go.  

Well cooked burger patties, simmered in thick brown gravy served with mashed potatoes and green beans.  I also served this with some sauteed mushrooms.  Grilled onions are also a great accompaniment as well.  You make this how you like it.  Next time, I am going for the grilled onions too!

I am not sure why we don't have this more often.  It is delicious, economical and filling.  Always have enough left for lunch for two the next day.  This could even be done as a leftover makeover using grilled burgers from earlier in the week.  If you love to plan ahead, this would be a great use for those patties!  


I hope you enjoyed our little trip down memory lane.  I hope that you give the hot hamburger place a coveted spot on your weekly menu in coming weeks.  I think you will be glad you did!  Then think about all those other things you used to love as a kid when you got the great chance to eat at the diner or truck stop or cafe.  Make those things too!  Introduce them to your children or grand children.  Tell them your story around the dinner table!  Those are priceless moments you cannot purchase but they will be cherished!

I hope you try this and I hope you love it!

Happy Eating!

You can see how I made this in my YouTube video here:


Noreen's Kitchen
 Hot Hamburger Plate


Ingredients

2 pounds ground round
1 teaspoon garlic powder
1 teaspoon onion powder
1 teaspoon cracked black pepper
1 teaspoon season salt
1 teaspoon steak seasoning
1/4 cup to 1/2 cup all purpose flour
4 cups beef stock or consommé


Step by Step Instructions

Combine ground chuck with spices and mix well by hand to incorporate.

Shape into 6 patties.  Poke a hole in the middle of each patty for even cooking.

Heat a cast iron skillet or heavy bottomed skillet or griddle over medium high heat.

Place burger patties on to cook.  You may need to do this in batches if you have more than your pan can accommodate.

Cook for about 5 being sure there is a nice crust.  Then flip and cook for an other 5 minutes.

When burger patties have been cooked completely, remove from pan to a plate lined with paper towels.  Set aside. 

Drain the fat from the pan and wash out your pan. 

Return a few tablespoons of the fat back to the cleaned pan and whisk in the flour over medium heat.

Add the beef stock and whisk well to incorporate.

Continue to cook over medium heat stirring to avoid lumps until the gravy has thickened to your liking.

Add the cooked burgers back into the pan and turn to cover in gravy.  Allow to simmer for 5 minutes.

Turn off the heat and allow to sit for five minutes before serving.

Serve with mashed potatoes and green beans, maybe a biscuit.  Now you have a southern style, down home hot hamburger plate that would make any roadside diner, homestyle café or truck stop proud!

Enjoy!

Get a printable copy of this recipe on my website:  http://bit.ly/2aDOTqC

Thursday, July 28, 2016

Christmas in July Holiday Gift Suggestion! Copper Chef Non Stick Pan!


Rolling into the end of our Christmas in July week we wanted to present one more gift idea in the form of a product review. We reached out to the people at Copper-Chef to ask if they would be willing to send us one of their pans to try out and review for you! They were so kind to send us one of their deep square copper chef pan sets complete with a fryer basket, steamer rack and a set of plastic utensils. Today we are going to share with you how we felt about this pan.

We have been using this Copper-Chef pan for about a month and have done everything from scrambled eggs to frying and making the mac and cheese from their cookbook which was included. Our opinion is that this pan is all that they say and it is really great! I love this pan for a number of reasons. First, it is sturdy, next it has great heat conduction due to the stainless steel plate on the bottom of the pan. Next we love the fact that this pan is square and deep and you can fit a ton into it. We also love that this pan goes from the stovetop to the oven with ease and can sustain heat up to 800 degrees! My oven doesn't even go that high! This gives you the benefits of cast iron without the weight of cast iron. 


When I told my mom that I was getting one of these to review she got excited so I will be giving her one for a Christmas gift! I think this would make a great gift for anyone on your list! The newlyweds, the foodie, the college graduate just getting their first place or anyone who is starting out. I think this pan is a great addition to just about any cookware collection. In my case, I have had and have used a lot of cookware. Some great, some, not so great. This pan is great and I can see myself using it for a long time to come.

We demonstrated the non stick surface by frying an egg dry! Unheard of and anyone who knows anything knows that frying an egg dry can be problematic and virtually impossible to flip over, much less remove from the pan in one piece. This pan did just that. We also did the old, burn a piece of cheese test. We slapped a slice of American cheese down in that hot pan and let it go. The results were stunning and impressive. 


I hope that if you are in need of a great pan or if you are in need of a great gift, you will consider checking out this Copper Chef pan because it is a great addition to any kitchen!

You can find the Copper Chef pan on their website here: http://bit.ly/2a3ghlN

You can also find Copper Chef's store on Amazon: http://amzn.to/2aA2gNr

Gluten Free Chewy Butter Bars ~ Not Exactly Perfect Baking!


Today I had hopes of sharing a really great gluten free, dairy free, vegan shortbread cookie recipe for our Christmas in July week!  HOWEVER, as all good plans of mice and men, this did not turn out as I had hoped.  It did turn out tasty, just not short bready.  So we soldier on and make lemonade out of our lemons.  I figured it is always good to share a failure or two when they occur because we are all human and even the best of us makes a mess out of something from time to time.

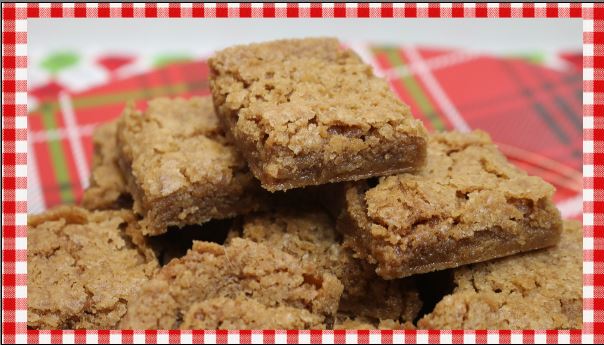
That being said, I will say these were delicious but they were more of a chewy blondie texture with a crispy top than a short bread cookie that I was going for.  That will teach me to just roll with a regular recipe when trying to make a gluten free, dairy free offering.

These are made out of a gluten free flour blend from Bob's Red Mill, some demerarra sugar and some Coconut Oil baking sticks.  The dough went together really well.  It looked just like a regular shortbread cookie, however when baked they took on another appearance.  So we are now calling these a chewy butter bar because of their chewy texture and buttery flavor.  They will get eaten.  They would be a great addition to your holiday baking if you have a loved one or friend on your list who has these specific dietary needs.


In the end, I don't think this should be attempted as I did it, but I will post the recipe on my website in case you want to give it a whirl.  I think you should do either or, but not both the gluten free flour and the coconut oil sticks.  SO you could do a regular flour and coconut oil sticks OR you could do gluten free flour and regular butter.  I think those would both be more successful than my attempt.

In the end, I learned a few valuable lessons.  I hope that you take them away from this video as I did.  Gluten free baking is not always as easy as it seems.  You can't always just sub out one type of flour for another or one type of fat for another and expect things to go swimmingly.  There are lots of other Gluten free cooks who share great information on YouTube.  One of my faves is EZ Gluten Free.  She can be found here:  http://bit.ly/2aiMTnq


I think I will leave it up to those great cooks to sort out the gluten free, dairy free, vegan recipes.  I will do my best to give them a try from time to time and hopefully we can all see great results!

I hope you enjoyed today's video, however funny, helpful or disastrous it was!  in the end, we all had a good time and I enjoyed bringing it to you!  I hope you are enjoying Christmas in July week!  We will be back tomorrow with another gift idea for you to consider!

As Always, thank you for joining me and for being a part of this awesome community on YouTube!

Happy Eating!

Get the printable recipe here:   http://bit.ly/2axyfwc


Noreen's Kitchen
 Gluten Free
Chewy Butter Bars


Ingredients

2 cups gluten free baking flour
2 cups sugar
1 cup softened butter
1/2 teaspoon salt
1 teaspoon vanilla extract

Step by Step Instructions

Preheat oven to 375 degrees

Cream butter and sugar together until light and fluffy.

Add salt and vanilla and blend till smooth.

Add flour and combine until smooth.

Press into a 9x13 inch baking pan or a 1/4 size sheet pan.

"dock" the dough by pricking the surface of the dough all over with a fork several times.

Place in the oven and bake for 30 minutes or until the edges are slightly browned.

Remove from oven and cut into squares or bars while still in the pan.

Return to the oven for an additional 10 minutes.

Remove from oven and place on a wire rack until cooled.

Store cookies in an airtight container for up to 1 week.


NOTE:  Originally I made this recipe with both gluten free flour and coconut oil sticks in instead of regular butter.  The result was not as I had hoped.  So I recommend that you use regular butter along with gluten free flour or use regular flour along with the coconut oil stick, but not both together.

Enjoy!

You can see how I made these in my YouTube video:  http://bit.ly/2af1Tlq

Monday, June 27, 2016

How To Fire Roast Green Chilies At Home! A Serious Summer Treat!


Summer is on and we are heading right into the thick of it!  Independence day is almost here and we have all things picnic and BBQ on our mind.  So on that note we are embarking on a theme for July of perfect picnic and bbq foods.  Today we begin with some amazing and easy fire roasted green chilies!  

Green chili season is just about here for those of us who grew up in the southwest and remember the middle of summer being the time when Hatch green chilies would be abundant and being fresh roasted at the farmer's market, at the swap meet and just about anywhere else you can think of!  

I lived in Northern Arizona for a long, long time and July was always when the fire roasters would show up at the Flagstaff Farmer's Market.  Giant mesh drums set over open flames.  The drums were filled with Hatch green chilies fresh out of New Mexico fields.  The smell is intoxicating and the sheer volume has you pick up on that delicious fragrance from a mile away, quite literally.  

The deep green peppers would go into that drum by the barrel full and the roasting man would turn that drum until those peppers were soft, black and blistered,  That is the time when you would request the amount you would like.  He would put them in a paper sack and away you would go.  Ready to create something wonderful.

The drive home would be difficult because the smell of those chilies is amazing and you want to just dig right in!  You can't get home fast enough to slap one on a freshly grilled burger with melted pepper jack cheese on top!  


Enough reminiscing though!  You don't have to live in New Mexico or Arizona to enjoy fire roasted green chilies at home!  Keep in mind that Hatch green chilies will be available soon in the stores and I can even get them in my area so if you find them buy a case and make your own salsa because it will be amazing!  But you can do this with Anaheim chilies with no problem.  

Get your grill good and hot.  No matter if it is charcoal or gas.  Just get it nice and hot.  Then pop those peppers right on that grill.  When you hear them start popping and crackling you will know that the magic is beginning to happen!  You want to keep turning and turning and turning until the skin is black and blistered all around the pepper and they become soft and no longer have a stiffness to them.

When you have removed the peppers from the grill you want to put them into a large bowl.  Then back into the kitchen!  Fill the bowl up with cold water and begin to gently rub the charred skin off the peppers.  It should come off quite easily.  The gently pull the stem off and run your finger down the side to split the pepper open.  Dunk it back in the water and wash the seeds away the best you can.  Then into an awaiting plate or bowl.  

You can use these peppers to make pork green chili, chicken salsa verde, green chili sauce, chunky roasted green chili and onion salsa, or green chili burgers.  You will want to use these in about a week and if you can't just pop them in the freezer until you are ready to use them.


It is not recommended to can these on their own, however you could use them in a recipe calling for green chilies if you are canning up some salsa or other dish.  You will want to research that on your own.  

I hope you see how easy it is to fire roast your own green chilies at home.  I hope you give this a try and I hope you love it because there really is nothing better than a fresh fire roasted chili on your burger!  

Happy Eating!!

You can see how I did this in my YouTube Video: