}]; Noreen's Kitchen: Breakfast
Showing posts with label Breakfast. Show all posts

Wednesday, March 15, 2017

Homemade Corned Beef Hash! St. Patrick's Day Leftover Makeover!! Noreen's Kitchen


Since St. Patrick's Day is a couple of days away, I knew I had to make some homemade corned beef hash to share with you all!  This was made from my home canned corned beef.  You can see how I did that here:  http://bit.ly/2mOtaVr  I will also be using some of the potatoes that I baked in my slow cooker in my recent video which you can check out here:  http://bit.ly/2mERlpl.  If you are a fan of corned beef, corned beef hash is the perfect way to use up leftovers from your St. Paddy's day meal!  

I have used my home canned corned beef.  Three pints of it to be exact, so this came to about six cups of meat once drained.  When meat is canned it can be easily flaked.  I broke this corned beef up with my fingers so it looks like shredded beef.  If you prefer, you can take the time to chop it up into a very small dice, but I see no point, when it will shred super easy.  I also used three large potatoes that I baked in my slow cooker.  I removed the skins and cut them up into dices.  I also chopped a medium onion which ended up being about two cups.  Enough to fill a pint jar.  I also added a bit of butter for flavor as well as to get everything going.  You can use oil if you prefer.


Corned beef hash is super quick and easy to make it is budget friendly and tasty too boot!  The work comes from the chopping or the preparation.  In French, the word "Hasche"  pronounced Hash-shay, means to cut into small pieces.  So the word for hash as used in corned beef hash or roast beef hash or vegetable hash is indicative of the true French meaning of the root word.  I love word etymology, don't you?  Well now you know.  

I like to melt some butter in a large skillet and add the onion to cook for a while over a medium low heat.  This will allow it to caramelize just a bit before tossing in the meat and the potatoes.  Once the onion is ready, I added the meat and allow this to saute for at least five minutes, stirring occasionally to be sure that all the meat is heated through and has rendered a bit of the fat, if any into the pan for flavoring the dish.  

Once the meat is heated, I added in the diced, cooked, potatoes and stirred those in.  This is the hardest part of making corned beef hash.  The waiting.  I like to mix well then flatten with a spatula.  I like to allow a bit of a crust to form on the bottom of the pan, this will help created nice browned bits that will mix in with the hash and pop with flavor.  Sometimes I like to add about a half cup of water to the pan then pop a lid on to steam everything through and get it nice and hot.  This will also moisten the mixture making it easier for all the flavors to combine.


I must be honest, as a family, we love old fashioned corned beef hash from a can and we have it from time to time for dinner or breakfast with fried eggs and toast.  It is just something that hearkens back to my childhood.  A happy memory of days gone by.  Scrapple is the same way for me.  Just don't look at the ingredients or if you do, be very brave cause there is no turning back!  This homemade version is very delicious and does not compare to the canned version.  In fact, they are not even in the same category, other than in name.

When the crust has developed to your liking and everything is heated through, you are ready to serve.  We like ours with over easy eggs, with good runny yolks along with some toasted homemade bread.  Biscuits are great too if you prefer.  No matter how you make this, just make it.  You will love it!  


I hope you give homemade my version of homemade corned beef hash a try!  Even if you don't have home canned corned beef you can use leftover or even the corned beef from a can sold near the luncheon meat.  I won't tell!  You use what you like!  

I hope you try it and I hope you love it!

Happy Eating!

You can see how I made this in my YouTube video here:


Friday, September 2, 2016

Back To School and Out The Door!! PB&J Protein Smoothie Recipe!


There is no better, quick and easy breakfast hack than a smoothie!  Make that a protein smoothie and you are really in business!  This one is no exception!  Today I am sharing a great breakfast smoothie that you can whip up quick before leaving the house and you will be fueled and ready to go for the morning and won't be hungry before lunchtime comes around!


This smoothie is taking some inspiration from the peanut butter sandwich.   I have used almond milk, ice, peanut butter, protein powder and some frozen mixed berries as well as a frozen banana.  Do you like to add greens to your smoothie?  Throw in a handful of power greens or spinach or whatever you have on hand to boost the nutrition or green factor if you like!  This smoothie is low in added sugars but high in flavor.  It is high in protein coming in with 22.8 grams of protein!  Perfect for getting you going!  This also has great fiber from the berries as well as a ton of calcium!

You can hack this smoothie by getting your "smoothie packs" ready to go whenever you do your weekly meal prep.  Just stock your freezer with these packets that you can make up with the frozen fruit of your choice all in one place, you can even toss in the peanut butter and the protein powder if you want as well.  Stow them in a basket in your freezer and pull them out on those busy mornings when a smoothie is in order and waz one up by adding the milk and ice.  Ready, set go!  Pour that into a mason jar, screw on the lid pop in a straw and you are on your way to work!


You can also mix this up any way you like.  I used mixed berries, but you can use frozen strawberries, pineapple, peaches or whatever fresh frozen fruit you like best.  What flavor of "jelly" do you like on your PB&J?  Make it your own.  Take it a step further and add in whatever delicious extras you like in a smoothie.  A handful of spinach, power greens or kale.  A splash of juice, or even a squeeze of agave if you like things a little sweeter.  No matter what you do here you can make it delicious!

I hope you give this PB&J Protein smoothie a try and I hope you love it!

Happy Eating!

You can see how I made this smoothie in my YouTube video:


Wednesday, August 24, 2016

You Do Have Time For Breakfast! Microwave Omelette In A Mug ~ Back To School Breakfast Hacks!!


Today we continue with our back to school breakfast hacks!  This one is going out to all my dorm dwellers!  Folks who live in dorms.  If you are away a college, in the military or in a situation where you are required to live on site for work or any other reason.  This is for you!  Omelette in a mug is simple, quick and delicious and you can make this just about anywhere!

The first trick is to make sure you have a good quality porcelain mug.  I have a stoneware soup mug that I will be using to make my omelette.  A heavy tempered glass mug or even a small bowl will work as well.  Just don't use plastic here.  You, of course can also use a microwave omelette maker if you choose.  I have one, but for today's demonstration I will be using my soup mug.  


What do you like in your omelette?  That is the question!  You make your omelette the way you like it.  Today I am going to start out by spraying my mug with a bit of coconut oil spray and then adding my eggs.  Do you like two or three?  Use the number you like best!  I am cracking in two eggs and a splash of milk or cream, then adding some mix ins that are my favorite for this type of omelette.  

I have prepared a couple tablespoons of mushroom, diced bell pepper, chopped Roma tomato,  and sliced green onion for the veggies.  I am also adding a couple of sliced brown and serve sausages along with about 1/4 cup of shredded cheddar cheese.    Go ahead and toss it all in there and mix it up well with the egg mixture. 

Give everything  a good pat so that it is all submerged and pop this into the microwave for 1 minute on high.  Then take it out and stir it well with the fork and return it back to the microwave for another minute on high.  Stir again, if needed.  Then if it is not cooked all the way cook for 30 second intervals, inspecting in between for doneness.  My omelette took 3 minutes total.  Then I allowed it to sit in the mug for one minute before removing it to a plate to enjoy.

You can leave your omelette in the mug and enjoy it that way with a little more cheese, a bit of salsa and sour cream or you can remove it to a plate and toast a bagel and enjoy it like I did with some sliced avocado.  You can also cut this in half and wrap it in a warm tortilla or even stuff it into a pita or stack it on an English muffin with a slice of cheese for an awesome breakfast on the go!  Don't forget that this is just a great meal in general!  This omelette is a great option for breakfast, lunch or dinner!  Whenever you are craving a good meal but don't want to go out for it, make this and be happy!


These are easy to prep and you can do a bunch of chopping, slicing and dicing all at one time an either portion in sandwich bags or keep them in a container in your fridge.  When you are ready to mix them up bam!  Omelettes are done!  

So, if you are living in a situation where your only method of cooking is a microwave, pony up!  Make yourself one of these delicious omelettes and go crazy with your own original combinations!  What leftovers do you have?  Make it yours!  How about a B.L.T. omelette?  Or a pizza omelette?  Leftover spaghetti and meatball omelette?  Grilled chicken and veggie omelette?  So many choices!  Eggs are a great source of protein and they are cheap!  They are easy to find and you have room for them in your tiny little fridge that your microwave sits on top.    Even if you don't have to cook it in the microwave, give it a try because I think the results may surprise you!

I hope you do try this microwave omelette in a mug and I hope you love it!

Happy Eating!

You can see how I made this in my YouTube Video:


Friday, August 19, 2016

Back to School Breakfast Hacks!! Pancakes & Bacon!!


Another installment in my Back to School Breakfast Hacks series.  Today we tackle pancakes and bacon!  We always seem to have homemade pancakes in our freezer because whenever I make pancakes, I always am sure to make extras.  Freezing pancakes is a great way to always be able to offer your family something warm for breakfast.  

I will be the first one to tell you that I used to purchase frozen pancakes.  The "good" kind though from the Dutch bakery.  However when inspecting the ingredients I discovered they were no better than the big name brands as far as mystery, unpronounceable ingredients, so  making them is the way to go for us.  

Let's face it, making pancakes is super easy. You can make them from your favorite mix or you can make them from scratch.  I am going to share with you my version of a very simple, and delicious pancake recipe that I like to call my 1+1+1 pancake batter.  This formula is simple.  For every cup of flour you use, you will need a cup of milk, one egg and a teaspoon of baking powder.  I also add a tablespoon of sugar and a pinch of salt.  Whisk it all together and get your griddle ready!  Pancakes any way you like them!  Add blueberries, strawberries, chocolate chips, bananas, walnuts pecans, you name it!  Whatever is your favorite is what you should make.  


If you are going to freeze these for later, then I recommend removing the pancakes from the griddle to a cooling rack.  Allow the pancakes to cool completely and then package as desired.  You can layer these between parchment or freezer paper in a plastic container on in a large plastic bag that you can just reach into and grab what you need or you can individually portion the pancakes as you like.  Our preference is three to a sandwich bag.  You can do what you like.  If you have smaller children, one or two may suit your needs better.  If you have teenage boys, well, then put the whole batch in one bag cause you know they are going to eat those Gethro Bodine style!

When the time comes to reheat, simply remove your short stack from the freezer bag and wrap in a paper towel.  Place in the microwave for 45 seconds to a minute and then enjoy.  You will want to test the time because all microwaves differ int their power and cooking intensity. 

While I was cooking the pancakes, I also had a couple pounds of thick cut bacon going in the oven.  Many of you know I like to cook my bacon on a sheet pan in the oven.  This makes life a lot easier and I don't have to tend a pan of splattering grease while trying to do something else.  I will tell you that I have never perfected cooking bacon in a skillet.  Can't do it to save my life.  Burns every time!  This sheet pan method is tried and true and  I learned it while spending many years in restaurant kitchens.  This is how they do it for buffets and breakfast rushes.  While they par cook theirs and finish on the grill per order, I cook mine all the way.  We like ours just after it has become crisp but before it gets too dark.  Baking it in the oven can help to regulate the perfect strips for your taste.  


When the bacon is done I remove it from the pan immediately and then place it on layers of paper towel to absorb any extra grease.  Allow them to cook completely then roll them up into the paper towel and place in a plastic freezer bag.  Pop them all in the freezer and reach in and grab what you want.  Re-heat for 10 to 20 seconds or whatever suits your fancy and you are good to go!

I hope you give this back to school breakfast hack for pancakes and bacon a try and I hope you love it!

Happy Eating!


You can see how I did this in my YouTube video here: http://bit.ly/2b4KOym


Tuesday, August 16, 2016

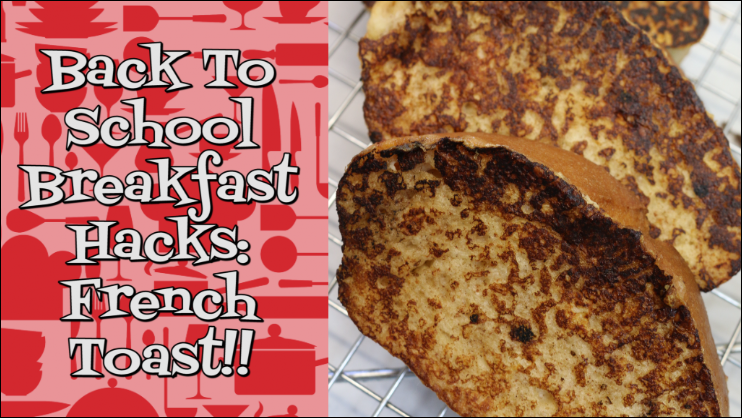
Back To School Breakfast Hacks: French Toast!!


Today we begin our back to school breakfast hacks tips!  First up, homemade French toast fast!  This is a super easy way to always have a great breakfast on hand for your family when days are busy, school is in session and sometimes we can be running late.  This is a great way to make your morning smooth and easy.  No need to always reach for a box of cereal!  You can get a protein packed meal into your family quick with a little forethought and preparation.

French toast is a favorite of many.  When you are firing up your griddle for a weekend breakfast, do a little planning ahead so you can make extra for the upcoming school week.  French toast is really great to make ahead and freeze.  Quick to reheat in the toaster, toaster oven or microwave and then a little syrup on top an you're good to go.  What child is going to say no to a hot slice of French toast on a busy school morning?  My guess is not a one!


A couple of tips for make ahead French toast that will help you on your way:  1) use real French or Italian bread that you slice yourself in about 1 1/2 to 2 inch thickness.  2) Dip, don't soak.  When you have time to make a super eggy delicious piece of French toast you can let that baby soak, but for frozen re-heatable, quick breakfasts you want to dip.  Allowing the bread to get too soggy will make these harder to re heat and less enjoyable to eat and 3) Remove from the griddle directly to a cooling rack so the bottom does not get soggy and they cool evenly all the way through.  That's it! 

When your French toast slices are completely cooled, pop each one into a plastic sandwich bag and toss those into a plastic container or freezer basket and freeze.  Then when you are ready to eat, simply remove from the freezer, pop into your toaster, toaster oven or microwave until done and add butter and syrup or fruit jam and enjoy.


This is one way that you and your family can enjoy a delicious, hot and nutritious homemade breakfast on even the busiest of mornings!  I will be sharing more back to school breakfast hacks in the coming days leading up to the new school year starting.  My girls have already started and I know in some parts of the country that is the case, however in others school will not start until after labor day.  It is never too late to be more prepared whether it is for school, work or anytime!

I hope you give this back to school breakfast hack for French toast at try and I hope you love it!

Happy Eating!

Thursday, August 11, 2016

Back On Track For Back To School! On the Go Breakfast Cookies!!


These breakfast cookies are so delicious you will forget that they are good for you!  Filled with oats, almond butter, nuts and dried fruits, these cookies will disappear fast and your family will be asking for more!


Today I am participating in a "Back to School Breakfast Treats" collaboration with my friend Gretchen from Gretchen's Bakery channel!  If you are not familiar with Gretchen's channel, please be sure to pop over and watch her homemade apple pop tarts video when you are done here and be sure to hit that subscribe button!  Gretchen is truly amazing!

My contribution for this collab is going to be a protein and fiber packed breakfast cookie that will take you from morning till lunch and give your body what it needs to keep on going when those late nights and early mornings of the back to school schedule begin to catch up with you!  

These cookies are egg free, dairy free, gluten free and they can be vegan if you sub out the honey I used here for more maple syrup, molasses, brown sugar or even agave nectar.  You choose.  

I have used almond butter in my cookies but you can use peanut butter, cashew butter or sunflower butter if you prefer.  I have used lots of oats, golden flax sunflower and hemp seeds to bulk up the fiber and protein.  Then for crunch and sweetness I have added chopped dates and chopped pecans.  For moistness I added mashed bananas and coconut oil.  

Your imagination is your only limit here.  You can change these up to suit your tastes by adding dried fruits or nuts of any kind, shredded coconut, even a cup of chocolate chips would be nice.  I can think of several combinations that would be just as delicious!  This recipe is so versatile I know once you try it you are going to love it!


This recipe makes 24 cookies, if you drop them using the #16 disher which is approximately 1/4 cup in size.  Just make sure to flatten them slightly with a wet spoon before placing in the oven to bake.  These were perfectly done in just about 18 minutes in my oven.  Yours may differ.

These cookies are perfect for grabbing on the go.  Toss a couple in your bag and you are ready for the day along with your big mug of coffee or tea.  Ready to face whatever the day may bring, body nourished and caffeinated!  I prep these cookies by putting each one into a separate sandwich bag and place them in an airtight container on the counter.  If you don't think you will eat these inside of a week, then place them in the fridge for up to two weeks or in the freezer for up to three months.  These can thaw on the counter overnight for early morning enjoyment.

I hope you will take the time to go on over to my friend Gretchen's channel and subscribe and enjoy all the delicious homemade bakery treats that she shares every week.  The homemade apple pop tarts look amazing, simple and delicious and I know you are going to want to try them!  Be sure to use the links above!


I hope you give these breakfast cookies a try and I hope you love them!

Happy Back to School and Happy Eating!

You can find the printable version of this recipe for my cookies here:  

You can see how I made these in my YouTube Video:


You can see how Gretchen made here awesome Apple Pop Tarts in her YouTube video here:


Noreen's Kitchen
 Back To School
Breakfast Cookies


Ingredients

1 cup mashed banana
1 cup peanut butter or nut butter
1/2 cup honey**
1/2 cup pure maple syrup
1/2 cup coconut oil, liquified
3 cups rolled oats
1 cup whole wheat flour or gluten free flour
1/2 cup ground flax seed
1/4 cup sunflower seeds
1/4 cup hemp seed
1/2 cup protein powder* (see note below)
2 teaspoons ground cinnamon
1 teaspoon baking soda
1 cup dried fruit such as
     cranberries
     cherries
     dates or raisins
1 cup chopped nuts such as
     almonds
     pecans or walnuts (optional)


Step by Step Instructions


Preheat the oven to 350°F.

In a large bowl, stir together the banana, coconut oil, peanut butter, honey, maple syrup and vanilla.

In a small bowl, combine the oats, flour, flax seed, sunflower and hemp seeds,  protein powder, cinnamon, and baking soda.

Stir dry mixture into wet mixture until combined. Stir in dried fruit and nuts.

Drop dough onto cookie sheets that have been lined with parchment or a silicone mat.

Using a metal spatula dipped in water, press each mound of dough into a cookie approximately 2 1/2 inches in diameter and 1/2 an inch thick.

Bake, one sheet at a time, for 13 t 15  minutes or until lightly browned.

Remove from oven and allow to cool on the pan for five minutes before transferring to a wire rack to cool completely.

Store in an airtight container or zip top  bag for up to 5 days.  These can be stored in the fridge if you live in a super warm area.  This will prolong their freshness.  You can also freeze for up to 2 months. Thaw on counter before serving.

*NOTE:  If you don't have protein powder you can increase the flour by 1/2 cup
*NOTE: If you wish for these cookies to be vegan, sub out the honey for molasses, agave or golden syrup.


Friday, May 13, 2016

Breakfast of Tropicals! Pineapple, Coconut Protein Smoothie Recipe!


This week for #Torani Friday I thought it would be fun to make a delicious breakfast smoothie chock full of good things that will make you happy and get you going for a good start to your day!

We love the pineapple coconut combination in our house!  Everything from smoothies and drinks to savory dishes and desserts.  Pineapple and coconut go together like Forest and Jenny or peas and carrots or peanut butter and jelly.  This tropical combination is also one of my favorites for a breakfast smoothie.  This one is not overly sweet and hits all the right notes!  With the addition of protein powder this one will take you from breakfast to lunch with no problem at all.


I have used a good handful of ice, you can use more or less if that is your preference, a generous half cup of fresh pineapple that I diced really small, some pineapple juice about 1/4 cup of unsweetened coconut flakes, 1/4 cup of organic whey protein, some coconut milk and Torani syrup in both coconut and pineapple.  I used about three pumps of each which ends up being just over a tablespoon of each flavor.


I used my Nutri Ninja drink mixer to whip up this smoothie but you could make this in any mixer or regular blender you have available.  I just tossed everything in and turned it on and let it run for about 30 seconds to make sure everything was smooth and creamy.

I garnished my smoothie with more flaked coconut and a little bit more sliced pineapple on the side of the glass for fun.  My recipe made enough for Rick and I to enjoy a smoothie for breakfast and we certainly did enjoy them!  


Because this is really an "idea" for a smoothie, the ingredient amounts can be adjusted to suit your taste and preference.  This smoothie was indeed, very smooth and not icy or frosty or thick.  If you like yours that way, add lots more ice.  You can even add coconut yogurt to make this thicker, tangy-er and boost the protein levels even more!  Like it sweeter?  Add more syrup.  You get the idea.  Make this your own.  But make it nonetheless.

Some of you may be saying "I can't believe she made a breakfast smoothie with that sugary syrup".  Well, you can believe it.  The way I see it is that Torani is made with pure cane sugar.  This is a simple sugar that is pure.  I have no problem adding a bit of this to my smoothie to make it even more delicious and boost the natural flavors that I have put in there to begin with.  You have to make the best decision for you and if you wanted to leave out the sweetener all together or sub out some honey or some agave, then go right ahead.  Your choice!

I hope you give this protein boosted pineapple coconut breakfast smoothie a try and I hope you love it!

Happy Sipping!

You can see how I made this in my YouTube video:


You can find Torani on their website here:
http://bit.ly/ToraniHome

You can get Bob's Red Mill Whey Protein here:
http://amzn.to/1NtoEFg

You can get Bob's Red Mill Unsweetened Coconut Flakes Here:
http://amzn.to/1NtoEoR

This is the drink mixer I am using, the Nutri Ninja Blender:
http://amzn.to/225ePjt

Business Inquiries can be sent to:
info@noreenskitchen.com