}]; Noreen's Kitchen: learn to
Showing posts with label learn to. Show all posts

Sunday, October 9, 2016

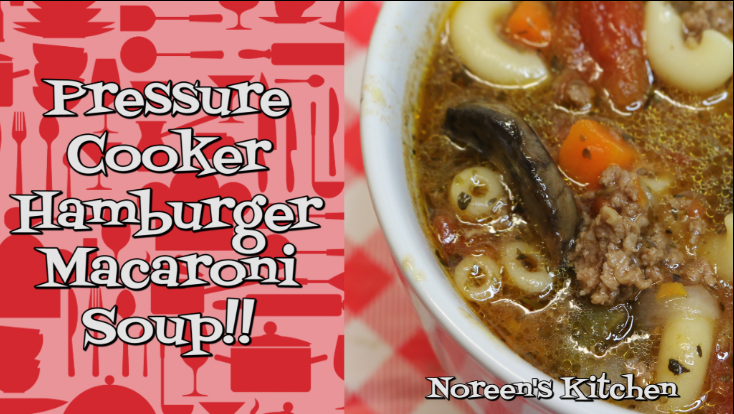
Hobo Soup in the Power Pressure Cooker XL


Here is a soup that is quick, easy, delicious and hearty!  This is the perfect fall soup to get on the table fast especially when you are using your pressure cooker!  Today I am sharing this delicious hamburger and macaroni soup that is chock full of veggies and a rich broth and hamburger that I happened to get on markdown from over $12 to under $3 for a pound of 90% lean burger meat!  Thinking outside the box a little I decided to make this delicious soup.

I am also testing and sharing my opinion with you all about the ever popular Power Pressure Cooker XL.  I have to say, I have seen this all over the TV, the internet and on home shopping television.  You may not know this, but I happen to love the infomercial.  If it is all about a kitchen item I am even more interested.  I want to know if these things actually do everything they say they do or if they fall short.  I can assure you that after trying out this particular machine, it lives up to all the talk!

I browned off the hamburger right in the PC on the chicken and meat setting.  Then I added in all of my veggies, broth and macaroni.  Gave everything a stir and popped the lid on making sure the valve was set to pressure.  I reset the machine to soup and stew and cooked for the default time of ten minutes.  I did a quick release so that the macaroni didn't over cook and I have to tell you this turned out perfect!

I think the next time I make this I will toss in a can of kidney or pinto beans for a great addition to this already hearty soup.  You could also add in cubed potatoes, too if you like.  This really reminded me of a bit of minestroni soup.  You can do what you like!  It's going to be great!


The Power Pressure Cooker XL arrived at my home a little over a month ago and I have cooked in it several times.  Many of the things I have shared with you in the past, pork tenderloin, soup, stew, meatballs, rice, hard cooked eggs, and more.  I have had a great experience with this and I really love this six quart size because the other PC I have, while I LOVE it, it is really large at 10 quarts and when I want to make a small batch of rice or wheat berries, a smaller unit is perfect.  This is super easy and user friendly.  I did not worry about that ever feared explosion that many people think of when they use a pressure cooker.  This is virtually fool proof.  I really believe that every busy home cook should have one of these appliances in their arsenal to make life just a little easier!


I would like to thank the good people at Tristar Products and Fusion Home Brands for sending this machine to me to use, test and review!  If you are interested in learning more you can find that on their website!  http://bit.ly/2cWRiNM

You can also find the Power Pressure Cooker XL on Amazon: http://amzn.to/2cS1lHn

I hope you will give this simple but delicious hamburger and macaroni soup a try and I hope you love it!

Get a printable version of this recipe on my website here:

You can see how I made this in my YouTube Video:


Noreen's Kitchen
 Pressure Cooker
Hamburger Macaroni Soup

Ingredients

1 pound ground beef
4 cups beef stock
1, 28 ounce can diced tomatoes
2 cups sliced Cremini mushrooms
2 cups mixed frozen vegetable blend
1 cup onion, chopped
1 cup celery, chopped
3 cloves garlic, minced
2 teaspoons Italian seasoning
2 cups elbow macaroni

Step by Step Instructions

NOTE:  I used a Power Pressure Cooker XL, 6 quart, electric pressure cooker to make this recipe in my video.  The settings described are for that make and model of appliance.  If you have a different brand of electric pressure cooker you will want to refer to the manufacturer’s instruction manual to determine settings and cooking times best suited for your particular machine. 

Pre heat the pressure cooker by selecting the “chicken and meat” button and allowing the vessel to come up to temperature for about 5 minutes.

Brown the ground beef until there is no pink left and no water remains in the bottom of the cooking vessel. 

Add in the rest of the ingredients and give everything a good stir.

Place the lid on the pressure cooker being sure that the release valve is set the pressure setting. 

Clear the display by hitting the Warm/Cancel button and select the soups and stews button.  The default time for this selection will be 10 minutes.  At this amount of time the macaroni will be very soft but not mushy.  If you like your macaroni a bit more “aldente” then you should adjust the cooking time to 6 or 8 minutes.

When the pressure cooker beeps and the cooking time has expired, you will want to quick release the pressure.  This will ensure you do not over cook the macaroni.  Do this by turning the pressure valve from pressure to steam release.  I like to place a towel over the steam to avoid a bunch of condensation on my cabinets. 

When all the steam has released and the pressure has come down, only then will the lid unlock.  Open up the pressure cooker and give your soup as stir.  You may want to let this sit for 10 minutes because it is volcano hot!  


The Frost Is On the Pumpkin and Autumn is Here! Pumpkin Bundt Cake Recipe


We are getting ready to celebrate the arrival of fall!  Many of you know that fall or Autumn is my very favorite season of them all.  Winter is a close second, spring coming in third and summer, well, you can have it!  Hate summer with a passion.  Who has time for hot, sticky, humid, weather and bugs?  Don't even get me started on sand in your pants from going to the beach.  Yes, Autumn is the perfect season!  Crisp mornings full of cool air with a tinge of wood smoke. Warm but not hot afternoons that are also not humid.  Colorful leaves falling to decorate the earth creating a red and gold carpet that rivals anything any artist ever envisioned.  Autumn is my jam.  

With autumn comes the welcomed arrival of pumpkin everything so I will just go there today with this delicious and simple, from scratch pumpkin cake that will have you dancing like Snoopy on top of her dog house!    

This pumpkin cake is very much the same as my banana cake only instead of banana we are using pumpkin and instead of a few spices we are using a lot of my homemade perfectly pumpkin spice blend.  I will eventually share this with you.  Regular old pumpkin spice will work fine.  If you don't have that, I will give you a simple formula in the written recipe that will be available on my website.  


This cake is simple and delicious.  It is moist and best of all it can be dressed up or down.  I have made it in a Bundt pan in this video because we took this to our monthly church pot luck a couple of weeks ago and this made for simple portioning.  The Bundt cake does take about twice as long as baking this in a 9 x 13 pan, but if you are going for looks, go for the Bundt!     You could also make this in two loaf pans or in two nine inch rounds,  three eight inch rounds or this will make 3 dozen standard cup cakes.  That's a lot of choices!  

This cake has no added oil.  Only the eggs and buttermilk to serve as the fat along with the pumpkin puree to keep the cake moist.  You won't miss it, I promise.  This cake is delicious just the way it is or you go simple and dust with powdered sugar or really go whole hog and slather on some cream cheese frosting.  This is best done if you have made the sheet cake version of this recipe.  Today I chose to go somewhere in between with a simple icing glaze flavored up with maple and vanilla extracts and enough powdered sugar and a splash or two of milk until I got the perfect consistency.  Then I draped that glaze right over the cake and let it dry.


This cake is delicious, any way you make it.  plain, frosted or glazed, you will have them coming back for more!

I hope you give this delicious pumpkin spice Bundt cake a try and I hope you love it!

Happy Eating!

You can get a printable version of this  recipe on my website here: http://bit.ly/2d0VTP0


You can see how I made this in my YouTube video:


Noreen's Kitchen
 Pumpkin Bundt Cake

Ingredients

1 cup pumpkin puree
1 cup buttermilk
2 eggs
1 teaspoon baking powder
1 teaspoon baking soda
1 teaspoon salt
1 tablespoon vanilla extract
2 teaspoons pumpkin pie spice
2 cups brown sugar
2 cups flour
Maple Glaze
2 cups powdered sugar
1 teaspoon vanilla extract
2 teaspoons maple extract
1 tablespoon maple syrup
2-4 tablespoons milk, to achieve thick icing

Step by Step Instructions

Preheat oven to 350 degrees.

Spray a 10-12 cup Bundt cake pan with cooking oil spray.

Whisk together pumpkin puree, buttermilk, eggs vanilla and sugar in a large bowl until well combined.

Add flour, baking powder, baking soda, spices and salt and wisk well to incorporate. 

Pour batter into prepared pan and distribute evenly.  Smooth top.

Bake for 55 to 60 minutes or until a wooden skewer inserted in the center comes out clean with no sign of wet batter.  The top will spring back when lightly touched.

Remove From oven and allow cake to cool in the pan for 10 minutes before removing to a wire rack to cool completely before glazing.

Prepare glaze by whisking together powdered sugar, extracts, syrup and 1 tablespoon of milk at a time until you get a thick but pour-able consistency that will cling to the sides of the cake.

Drizzle  the icing evenly over the cake being sure to glaze down the center.  Allow icing to dry in before slicing and serving.

Store cake in a cake dome or air tight cake keeper.  This cake will last for up to one week, but won’t last that long, if you know what I mean!  LOL!


Tuesday, August 16, 2016

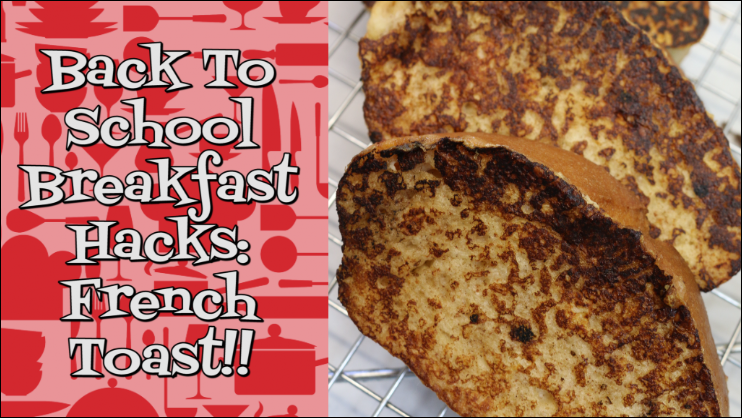
Back To School Breakfast Hacks: French Toast!!


Today we begin our back to school breakfast hacks tips!  First up, homemade French toast fast!  This is a super easy way to always have a great breakfast on hand for your family when days are busy, school is in session and sometimes we can be running late.  This is a great way to make your morning smooth and easy.  No need to always reach for a box of cereal!  You can get a protein packed meal into your family quick with a little forethought and preparation.

French toast is a favorite of many.  When you are firing up your griddle for a weekend breakfast, do a little planning ahead so you can make extra for the upcoming school week.  French toast is really great to make ahead and freeze.  Quick to reheat in the toaster, toaster oven or microwave and then a little syrup on top an you're good to go.  What child is going to say no to a hot slice of French toast on a busy school morning?  My guess is not a one!


A couple of tips for make ahead French toast that will help you on your way:  1) use real French or Italian bread that you slice yourself in about 1 1/2 to 2 inch thickness.  2) Dip, don't soak.  When you have time to make a super eggy delicious piece of French toast you can let that baby soak, but for frozen re-heatable, quick breakfasts you want to dip.  Allowing the bread to get too soggy will make these harder to re heat and less enjoyable to eat and 3) Remove from the griddle directly to a cooling rack so the bottom does not get soggy and they cool evenly all the way through.  That's it! 

When your French toast slices are completely cooled, pop each one into a plastic sandwich bag and toss those into a plastic container or freezer basket and freeze.  Then when you are ready to eat, simply remove from the freezer, pop into your toaster, toaster oven or microwave until done and add butter and syrup or fruit jam and enjoy.


This is one way that you and your family can enjoy a delicious, hot and nutritious homemade breakfast on even the busiest of mornings!  I will be sharing more back to school breakfast hacks in the coming days leading up to the new school year starting.  My girls have already started and I know in some parts of the country that is the case, however in others school will not start until after labor day.  It is never too late to be more prepared whether it is for school, work or anytime!

I hope you give this back to school breakfast hack for French toast at try and I hope you love it!

Happy Eating!

Tuesday, July 26, 2016

No Mix? No Problem! Homemade "Rice-A-Roni" Style Spanish Rice!


Last week my friend Heather of the Kneady Homesteader Channel mentioned that she was having a hard time getting Spanish rice just right.  This was not the first time she mentioned it to me.  She likes to use the "Rice-a-Roni" brand of Spanish rice mix, but in an effort to get away from the box mixes and make her own, she was less than enthused about the outcome of several attempts.  So I publicly promised to make her a video of how I do it.

This is that video.  In my head I am humming the jingle, "Rice-A-Roni the San Francisco Treat, Rice-A-Roni the flavor can't be beat....."  Well, you get the idea.  According to their website:  The DeDomenico family all enjoyed an old Armenian dish consisting of rice, vermicelli pasta and chicken broth. The rice and pasta were sauteed in butter before the liquid was added, giving the dish its distinctive taste.

In 1958, Vince DeDomenico decided to take this recipe and produce it for sale in grocery stores. He placed the rice and pasta in a box, and added a dry seasoning mix in place of the liquid chicken broth. Because this product was made up of half rice and half pasta, he decided to call it Rice-A-Roni.

Chicken Rice-A-Roni was first introduced in the northwestern states in 1958. With it came the first Rice-A-Roni commercial, featuring San Francisco’s Cable Cars and the now famous jingle. Created in San Francisco, Rice-A-Roni would soon be known to all as "The San Francisco Treat®!".  Chicken RICE-A-RONI

The product was an immediate hit. Over the next couple of years, Rice-A-Roni spread across the United States and by 1962 was available for all of America to enjoy. Building on the success of the original Chicken flavor, several other varieties were added. Beef, Spanish and Fried Rice-A-Roni came along next and also became very popular.

Anyone who grew up in the 70's and 80's most likely ate this product and loved it.  I know I did!  My mom often put this out for a side dish at supper.  Now that we are older and wiser, we are making an effort to move away from the processed, packaged, mixes of our youth and try to make those things from fresh, whole ingredients from our fridge and pantry.  This is very simple to do and you are going to love it!


I admit that this one does have one small secret ingredient and that would be the tomato and chicken bullion that will give this dish the taste that I think Heather is missing from her package version.  Aside from that, you already have what you need.  Rice, broken angel hair or vermicelli pasta, onion, garlic, bell pepper, taco seasoning, canned tomatoes and butter.  That's it!  The other secret is in the preparation.

You can use butter like I have or you can use oil, of your choosing.  I like to sautee the veggies just a little before adding the pasta and the rice.  You will want to toast both of those until they take on a brown hue and emit a lovely nutty aroma.  That is when you know it is time to move on, add your taco seasoning, broth and tomatoes.  Give it a good stir and then cook like any other rice!  Bring to a simmer, turn down the heat, cover and cook for 15 to 18 minutes or until the liquid is absorbed.  Take off the heat and then allow to sit covered for an additional 10 to 15 minutes.  Then fluff with a fork and serve.  


I used broken angel hair pasta and I could have broken it up even more.  You can also choose to use some orzo pasta if you like, but I wanted to stick  closely to the boxed version for this so the angel hair it was.  You can also adjust the seasoning if you like by adding more or less.  I have used my homemade taco seasoning, but you can use your favorite packet version.  

I hope that you give this version of homemade Spanish style Rice-A-Roni and I hope Heather gives it a try and finds that it hits the mark for her!  I really think that the tomato and chicken bullion is the secret here!

As always, I hope you try it and I hope you love it!

Happy Eating!

You can see how I made this in my YouTube video:


Noreen's Kitchen
 Homemade
Spanish Style Rice-A-Roni


Ingredients
2 cups parcooked or long grain rice
1 cup broken angel hair or vermicelli pasta
1, 14 ounce can petite diced tomatoes
1/2 cup onion, chopped
1/2 cup bell pepper, chopped
2-3 cloves garlic, minced
4 cups tomato and chicken broth
(see note)
2 tablespoons taco seasoning
4 tablespoons butter


Step by Step Instructions

Melt butter in a large heavy bottomed skillet or stock pot over medium high heat.

Add onion, garlic and bell pepper.  Stir well to coat.

Add rice and broken pasta to the pan and stir to coat.

Continue over medium high heat, stirring occasionally until the pasta and the rice take on a nutty aroma and a slightly toasted appearance.    You may hear popping during this process.

Add taco seasoning and stir well.

Add tomato chicken broth and tomatoes and stir well to combine.

Bring to a simmer, turn down to medium heat and cover.  Cook for 15 to 18 minutes or until the majority of the liquid appears to have been absorbed.  Do not remove the lid.

Turn off the heat and remove the pan to a cool burner or trivet.  Allow to sit and steam for 10 to 15 minutes before fluffing and serving.

NOTE:  I have used Knorr Caldo Tomate con sabor Pollo.  Or Tomato broth with chicken.  This bullion can usually be found in the Latin foods section of your grocery store.  It has a red cap and is next to the chicken and beef bullions. 


Enjoy!

The BEST Sauteed Mushrooms EVER!


Today I wanted to share with you a way I have recently discovered to make the very best sauteed mushrooms we have ever enjoyed.  Normally I would saute mushrooms with butter, onion, Worcestershire sauce and a few seasonings like fresh garlic, salt, pepper and even a bit of Italian seasoning.  That is a lot going on there.  No more!  The way I have discovered is the best ever!  Trust me on this one! My girls ask me to make mushrooms all the time, even if the really don't go with the meal.  

I have recently been able to get some beautiful white button mushrooms from my farm store where we get our milk.  They are hands down, but prettiest mushrooms I have seen in a long time and since I can get them in bulk,  I can make as much or as little as I like, however I normally make at least one pound at a time, but today I am doing two because we are having these along with a hot hamburger plate for dinner.


These start with a half a stick of butter, melted, then I add the cleaned  mushrooms to the pan and toss them in the butter.  Then I add a teaspoon of beef bullion powder and a teaspoon of seasoning.  I am using a garlic pepper seasoning called "Harlem Garlic Pepper" from Badia, I am totally addicted to this seasoning and have been adding it to a lot of different dishes as of late.  This is super garlicky.  Like garlic and garlic and garlic and black pepper and salt.  I get mine at my local Food Lion in the Latin foods section, but anywhere that sells this brand or has a great Latin food selection, will have this seasoning.  Badia is one of my favorite ethnic brands and I have a lot of different selections from them in my spice collection because they are delicious and affordable!

Toss all those spices and bullion powder in with the mushrooms and then put a lid on your pan, over medium high heat.  Leave it alone, don't even peek for at least 15 minutes.  When you come back the pan will be filled with all those good mushroom juices mixed with the butter.  Now remove the lid and let the pan continue to simmer for another 10 minutes or until most of the liquid is evaporated and the sauce is reduced.  When you come back the pan will sound like it is sizzling a bit.  This will be a good indicator that all the water is gone and all you have left is mushrooms, butter and amazing concentrated flavor!


Now enjoy taste these mushrooms and tell me they are not amazing!  The earthy flavor of the mushroom really comes out and is enhanced by that little bit of bullion powder and seasoning.  These are perfect in my opinion.  When your teenagers ask you repeatedly for something, you know it must be good.  If you are not a mushroom lover, I apologize, but you are really missing out!  

I hope you give this method of sauteing mushrooms a try because I promise you that you are going to love them!

Happy Eating!

You can see how I made these in my YouTube video:


Noreen's Kitchen
 Best EVER
Sauteed' Mushrooms

Ingredients
2 pounds button mushrooms, cleaned
4 tablespoons butter
1 teaspoon beef bullion powder
1 teaspoon garlic pepper seasoning

Step by Step Instructions

Melt butter in a large heavy bottomed skillet or stock pot over medium high heat.

Add mushrooms and stir to coat.

Add bullion powder and garlic pepper and stir well to combine.

Cover and allow to cook for 15 minutes or until the mushrooms have rendered all their liquid and have become soft.

Remove lid and continue to cook over medium high heat until you hear a sizzle, the liquid has evaporated and the mushrooms are lightly browned.  All that should be left in the pan is a beautiful buttery mushroom sauce and mushrooms. 

Serve with your favorite steak, meat loaf, or anything you like!


Enjoy!