
}]; Noreen's Kitchen: macaroni
Showing posts with label macaroni. Show all posts

Sunday, October 9, 2016

Hobo Soup in the Power Pressure Cooker XL


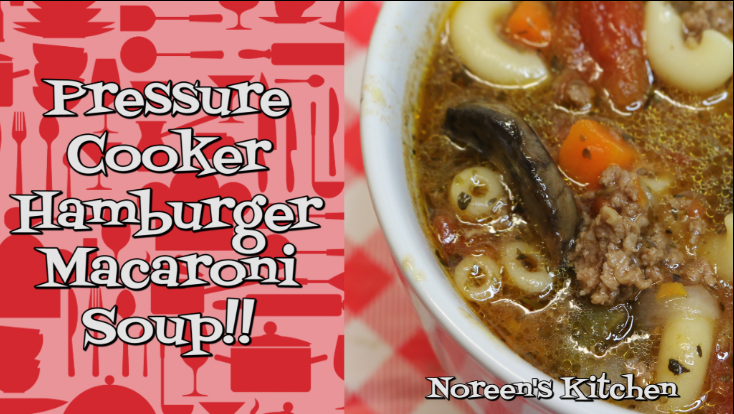
Here is a soup that is quick, easy, delicious and hearty!  This is the perfect fall soup to get on the table fast especially when you are using your pressure cooker!  Today I am sharing this delicious hamburger and macaroni soup that is chock full of veggies and a rich broth and hamburger that I happened to get on markdown from over $12 to under $3 for a pound of 90% lean burger meat!  Thinking outside the box a little I decided to make this delicious soup.

I am also testing and sharing my opinion with you all about the ever popular Power Pressure Cooker XL.  I have to say, I have seen this all over the TV, the internet and on home shopping television.  You may not know this, but I happen to love the infomercial.  If it is all about a kitchen item I am even more interested.  I want to know if these things actually do everything they say they do or if they fall short.  I can assure you that after trying out this particular machine, it lives up to all the talk!

I browned off the hamburger right in the PC on the chicken and meat setting.  Then I added in all of my veggies, broth and macaroni.  Gave everything a stir and popped the lid on making sure the valve was set to pressure.  I reset the machine to soup and stew and cooked for the default time of ten minutes.  I did a quick release so that the macaroni didn't over cook and I have to tell you this turned out perfect!

I think the next time I make this I will toss in a can of kidney or pinto beans for a great addition to this already hearty soup.  You could also add in cubed potatoes, too if you like.  This really reminded me of a bit of minestroni soup.  You can do what you like!  It's going to be great!


The Power Pressure Cooker XL arrived at my home a little over a month ago and I have cooked in it several times.  Many of the things I have shared with you in the past, pork tenderloin, soup, stew, meatballs, rice, hard cooked eggs, and more.  I have had a great experience with this and I really love this six quart size because the other PC I have, while I LOVE it, it is really large at 10 quarts and when I want to make a small batch of rice or wheat berries, a smaller unit is perfect.  This is super easy and user friendly.  I did not worry about that ever feared explosion that many people think of when they use a pressure cooker.  This is virtually fool proof.  I really believe that every busy home cook should have one of these appliances in their arsenal to make life just a little easier!


I would like to thank the good people at Tristar Products and Fusion Home Brands for sending this machine to me to use, test and review!  If you are interested in learning more you can find that on their website!  http://bit.ly/2cWRiNM

You can also find the Power Pressure Cooker XL on Amazon: http://amzn.to/2cS1lHn

I hope you will give this simple but delicious hamburger and macaroni soup a try and I hope you love it!

Get a printable version of this recipe on my website here:

You can see how I made this in my YouTube Video:


Noreen's Kitchen
 Pressure Cooker
Hamburger Macaroni Soup

Ingredients

1 pound ground beef
4 cups beef stock
1, 28 ounce can diced tomatoes
2 cups sliced Cremini mushrooms
2 cups mixed frozen vegetable blend
1 cup onion, chopped
1 cup celery, chopped
3 cloves garlic, minced
2 teaspoons Italian seasoning
2 cups elbow macaroni

Step by Step Instructions

NOTE:  I used a Power Pressure Cooker XL, 6 quart, electric pressure cooker to make this recipe in my video.  The settings described are for that make and model of appliance.  If you have a different brand of electric pressure cooker you will want to refer to the manufacturer’s instruction manual to determine settings and cooking times best suited for your particular machine. 

Pre heat the pressure cooker by selecting the “chicken and meat” button and allowing the vessel to come up to temperature for about 5 minutes.

Brown the ground beef until there is no pink left and no water remains in the bottom of the cooking vessel. 

Add in the rest of the ingredients and give everything a good stir.

Place the lid on the pressure cooker being sure that the release valve is set the pressure setting. 

Clear the display by hitting the Warm/Cancel button and select the soups and stews button.  The default time for this selection will be 10 minutes.  At this amount of time the macaroni will be very soft but not mushy.  If you like your macaroni a bit more “aldente” then you should adjust the cooking time to 6 or 8 minutes.

When the pressure cooker beeps and the cooking time has expired, you will want to quick release the pressure.  This will ensure you do not over cook the macaroni.  Do this by turning the pressure valve from pressure to steam release.  I like to place a towel over the steam to avoid a bunch of condensation on my cabinets. 

When all the steam has released and the pressure has come down, only then will the lid unlock.  Open up the pressure cooker and give your soup as stir.  You may want to let this sit for 10 minutes because it is volcano hot!  


Wednesday, August 10, 2016

Easy Cheesy!! One Pot, Stove Top, Mac & Cheese!!


We had such an amazing response from all of you regarding the macaroni and cheese recipe we mentioned in the review we did for the Copper Chef pan that we decided to do a video for you!  This mac and cheese is inspired by the recipe that is included in the cookbook that comes with the pan.  I tried it their way.  This is my way.  I love this mac and cheese and I know you will too.

Keep in mind that this recipe defies everything you have ever known about making homemade mac and cheese.  There is no roux.  There is no cooking the macaroni separately.  This is seriously done all in one pan and takes about 30 minutes from beginning to end.  What you have when you are finished, is the most amazing, creamy and delicious mac and cheese ever!  You can spruce this up or down any way you choose.  Their basic recipe is good, but mine is better.  I have added more liquid and more cheese.  I have also boosted the flavor with lots of extra seasonings which the original recipe did not call for.  I have added both garlic and onion powder as well as dry mustard, salt, pepper and Worcestershire sauce which I think needs to go in mac and cheese!  Because cheese and Worcestershire sauce are best friends!


I really love this concept.  Being able to enjoy a great serving of macaroni and cheese that is not baked is really nice.  This is super creamy and cheesy.  I have added more cheese and more water to my recipe because I felt like it needed it and it gives the finished product a nice cheese sauce which I love.  This will serve 8 to 10 people as either a side dish or main course.  With a salad and crusty bread this is going to be a very satisfying comfort food meal.

I will continue to share recipes I make in my Copper Chef pan and am so grateful that they shared this with me.  

You can find the Copper Chef pan on their website here:  http://bit.ly/2a3ghlN

You can also find Copper Chef's store on Amazon:  http://amzn.to/2aA2gNr


I think you could easily make this in a pan that has a ceramic coating but I don't recommend this method if you are using a stainless steel, other nonstick or cast iron pan.  I would just worry that it may burn too easily.  You never know till you try so you could always give it a go and report back!


I hope you give this one pot, stove top mac and cheese a try and I hope you love it!

Happy Eating!

You can see how I made this in my YouTube video here:


Noreen's Kitchen
 One Pot Stove Top
Mac & Cheese


Ingredients

1 pound elbow macaroni (dry)
2 cups heavy cream
2 cups milk
3 cups water
1 tablespoon corn starch
4 tablespoons butter
1 teaspoon salt
1 teaspoon cracked black pepper
1 teaspoon garlic powder
1 teaspoon onion powder
1 teaspoon mustard powder
1 tablespoon Worcestershire sauce
4 cups shredded cheddar cheese


Step by Step Instructions


Place all ingredients in a large ceramic skillet. I used my Copper Chef square pan.

Stir and set over medium low heat covered.

Stir occasionally until the mixture is thickened and the macaroni is done to your liking. 

This entire process can take between 25 and 35 minutes.  You will want to stay close and monitor the mixture to be sure it is not burning or that the macaroni is not getting overcooked. 


Enjoy!


Easy Cheesy!! One Pot, Stove Top, Mac & Cheese!!


We had such an amazing response from all of you regarding the macaroni and cheese recipe we mentioned in the review we did for the Copper Chef pan that we decided to do a video for you!  This mac and cheese is inspired by the recipe that is included in the cookbook that comes with the pan.  I tried it their way.  This is my way.  I love this mac and cheese and I know you will too.

Keep in mind that this recipe defies everything you have ever known about making homemade mac and cheese.  There is no roux.  There is no cooking the macaroni separately.  This is seriously done all in one pan and takes about 30 minutes from beginning to end.  What you have when you are finished, is the most amazing, creamy and delicious mac and cheese ever!  You can spruce this up or down any way you choose.  Their basic recipe is good, but mine is better.  I have added more liquid and more cheese.  I have also boosted the flavor with lots of extra seasonings which the original recipe did not call for.  I have added both garlic and onion powder as well as dry mustard, salt, pepper and Worcestershire sauce which I think needs to go in mac and cheese!  Because cheese and Worcestershire sauce are best friends!


I really love this concept.  Being able to enjoy a great serving of macaroni and cheese that is not baked is really nice.  This is super creamy and cheesy.  I have added more cheese and more water to my recipe because I felt like it needed it and it gives the finished product a nice cheese sauce which I love.  This will serve 8 to 10 people as either a side dish or main course.  With a salad and crusty bread this is going to be a very satisfying comfort food meal.

I will continue to share recipes I make in my Copper Chef pan and am so grateful that they shared this with me.  

You can find the Copper Chef pan on their website here:  http://bit.ly/2a3ghlN

You can also find Copper Chef's store on Amazon:  http://amzn.to/2aA2gNr


I think you could easily make this in a pan that has a ceramic coating but I don't recommend this method if you are using a stainless steel, other nonstick or cast iron pan.  I would just worry that it may burn too easily.  You never know till you try so you could always give it a go and report back!


I hope you give this one pot, stove top mac and cheese a try and I hope you love it!

Happy Eating!

You can see how I made this in my YouTube video here:


Noreen's Kitchen
 One Pot Stove Top
Mac & Cheese


Ingredients

1 pound elbow macaroni (dry)
2 cups heavy cream
2 cups milk
3 cups water
1 tablespoon corn starch
4 tablespoons butter
1 teaspoon salt
1 teaspoon cracked black pepper
1 teaspoon garlic powder
1 teaspoon onion powder
1 teaspoon mustard powder
1 tablespoon Worcestershire sauce
4 cups shredded cheddar cheese


Step by Step Instructions


Place all ingredients in a large ceramic skillet. I used my Copper Chef square pan.

Stir and set over medium low heat covered.

Stir occasionally until the mixture is thickened and the macaroni is done to your liking. 

This entire process can take between 25 and 35 minutes.  You will want to stay close and monitor the mixture to be sure it is not burning or that the macaroni is not getting overcooked. 


Enjoy!


Monday, May 30, 2016

Comfort Food At It's Best! Bacon Cheeseburger Mac!


Sometimes you just need some comfort food!  This bacon cheeseburger macaroni skillet fits the bill!  My daughter Micah had happened to mention that I had not made this in a while so we planned to make it for dinner on the night in question.  While I have never done a video of this particular version I have done one of a pantry style version using pantry staples.  This one is made with all fresh ingredients and is perfectly delicious.

When I was growing up in the 1970's Hamburger Helper had just launched onto the scene.  Every busy mom in America reached for that box with the helping hand on the front.  Just brown a pound of burger meat and add the ingredients included in the box and a few others like water, milk and or butter and you were on your way to a delicious meal to set in front of your family.  The iconic commercials always made it seem so homey and great.  


The trouble was that my mom was one of the last hold outs of an age.  A stay at home mother who cooked three squares a day and was there when we needed her 24/7.  She did not work outside of the home until I was 16 years old, out of necessity because my father got laid off from his job.  So the first time we were served Hamburger Helper, it was a potato stroganoff version and all I can say if "eww"!  The memory still haunts me today.  Although we did try both the cheeseburger mac and chili mac varieties and liked them, they were not really a frequently featured meal in my home growing up.  


Fast forward several years later.  I am a newlywed, young married to a man who loves anything out of a box, mix, can or bag.  He loved, loved, loved cheeseburger mac.  So I made it for him.  Truthfully, it never was my favorite.  Fast forward again, I have a couple of daughters, and a desire to prepare healthy food for my family.  Anyone who has looked at the back of that box knows that this is not the best choice and we can do better.

So, better we will do!  Using a few simple ingredients that we most likely all have on hand, we can make this delicious bacon cheeseburger macaroni in no time.  This is a super fast meal that will satisfy and the amounts I have given will feed a family of four for at least two meals and a couple of lunch servings.  This is super budget friendly and easy enough for your "learning how to cook" teens can make without much supervision.    


I have used 2 pounds of 80/20 ground chuck.  This is my go to for this type of meal.  If you prefer, you can use 93% lean or even ground turkey if you like.  Brown that up then add onions, garlic, steak seasoning, onion powder, garlic powder, beef stock, milk, and cheddar cheese.  These simple ingredients come together all in one skillet to create a super satisfying and delicious, comfort food favorite that will have your kids and even your husband clamoring for more!


I have served mine with some lettuce, tomato and pickles on the side to go along with the "cheeseburger" theme and then to top everything off I also offered some additional shredded cheddar and crumbled bacon on the side in case anyone wanted theirs to be bacon cheeseburger mac!    This is the perfect meal for a busy night and the bonus is that you will have leftovers for another meal later in the week if you have a family of four like we do.


I hope you will give this homemade bacon cheeseburger mac a try.  Free from artificial ingredients, colors, flavors, additives, preservatives and a myriad of unpronounceable chemicals.  This version is quick, easy and accessible.  No special ingredients needed, just plain old fashioned goodness.  

I hope you give this bacon cheeseburger macaroni a try and I hope you love it!

Happy Eating!

Get a printable version of the recipe here:    http://bit.ly/1UpW9YH


Noreen's Kitchen
Bacon Cheeseburger Mac

Ingredients

2 pounds ground chuck
1 1/2 cups onion, chopped
3 cloves garlic, minced
1 pound macaroni
4 cups beef stock
2 cups milk (3 if you like it super creamy)
2 cups shredded cheddar cheese
2 tablespoons flour (optional)
1 teaspoon onion powder
1 teaspoon garlic powder
1 teaspoon steak seasoning
1 pound bacon, cooked and crumbled.


Step by Step Instructions

Brown ground beef in a large, heavy bottomed skillet over medium high heat.  Be sure to cook the meat until it actually begins to brown on the bottom of the pan, all the water has cooked out and all that remains is a bit of fat and a good sizzle.

Add onion, garlic and seasonings and stir well to combine.

Add macaroni, beef stock, milk and cheese.  Stir well being sure to incorporate everything.  

Bring to a simmer.

Reduce heat to medium and place a lid on the pan.

Allow to cook slowly for 15 minutes or until the macaroni is soft and cooked through.

If your mixture looks a little broken, like the fat has not absorbed,  add two tablespoons of flour to your pan and stir well. 

Turn off heat.  Place lid back on the skillet and allow to sit for 5 minutes before serving.

Serve with additional cheese and the bacon for topping if desired.

NOTE:  You can choose to stir the bacon into the macaroni mixture after it is cooked.  My girls did not want bacon in this so we compromised. 

Leftovers can be stored in an airtight container in the refrigerator and should be eaten within five days.  This recipe is not recommended for freezing.

You can see how I made this in my YouTube video: